Guide to Profitable Sales

Starting the Project on Platform.sh
Short-cut approach:
NOTE: You may want to review the Regular Approach section before you run the “Short-cut approach” so you know what it is doing behind the scenes. And if you are going to do other projects or migrate an existing project to Platform.sh having this process understanding is helpful.
A) Go over to this repository on GitHub and you will find the Platform.sh template for Drupal https://github.com/platformsh-templates/drupal9
<sub><sup>Please use the link from the actual CI/CD Project repository which is much more likely to be up-to-date.</sup></sub><br>
B) Click on the button at the top of the repository that looks like this ![]()
C) Follow the on-line instructions to bring up the hosted Drupal site
D) Back to the Github template site and follow the Drupal: using Lando section
E) In the “Migrate” section in the Github template for a totally new site follow the Getting started instructions
Regular approach:
You should have gone to Platform.sh, signed up for an account and installed their command line interface (CLI) tool. If not, jump back to the end of the Prerequisites and follow those instructions.
A) From the Platform.sh CLI enter: platform create
As prompted, here are your answers
* a project title (whatever your want to call it)
* your hosting region (e.g. us-2.platform.sh)
* the plan size (use ‘Development’ until you want to go live)
* Number of Environments (default 3)
* Amount of Storage (default 5 Gig)
* Confirm “Y” to continue
B) A Project ID will be assigned and shown. Copy and save it somewhere safe.
If you forgot and missed it, just type this platform project:list
C) At the CLI enter: platform environment:init <Project ID> -e main https://github.com/platformsh-templates/drupal9
NOTE: you can replace ‘drupal9’ with whatever other template version is available from this source.
This is now building your project on the platform.sh host.
(What is happening in this step is that the system is looking at the platform.app.yaml file in that template’s project root and the routes.yaml and services.yaml file that that template has in a next level down subdirectory called .platform to create a host system environment your project is running in. Eventually you might edit these files to tweak your environment to improve performance. But to start out the template being pulled has all you need.)
D) At the CLI, now enter: platform url -p <Project ID>
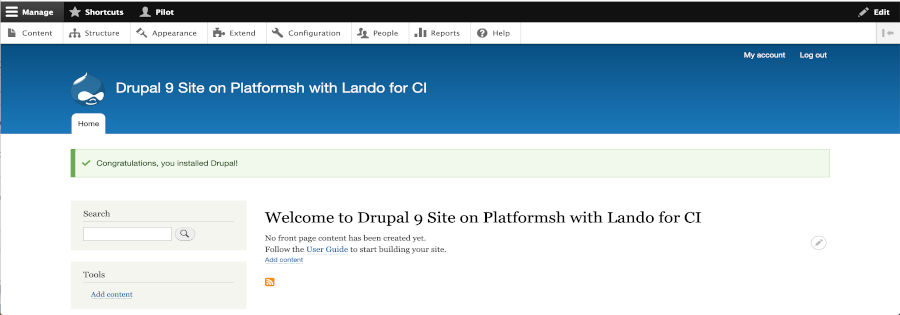
A new browser window will open where you see an install screen for the Drupal application. Don’t freakout if it looks slightly different since Drupal routinely updates versions for improvements. But, it should look something like this:
From that Drupal screen, setting up your Drupal site is pretty much like all the tutorials out there on Drupal. And, it is pretty much follow the prompts and answer the questions. The exception is that the “Set up database” step just sort of flies by automatically because the Platform.sh container recipes are doing it for you.
Step-by-Step
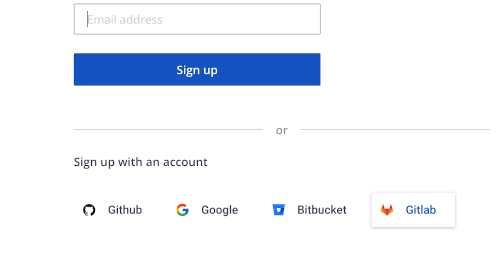
If you prefer a cookbook recipe approach this alternative shows you how you establish a Platform.sh account and bring up your Drupal project step-by-step. From the main screen at Platform.sh you first sign up. Sign up with the GitHub account rather than using just an email address; this approach giving you a head start on coordinating Platform.sh and GitHub.
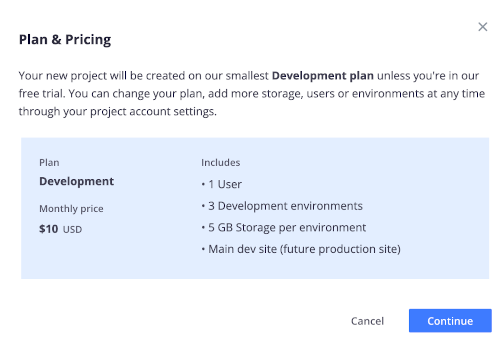
Then you will indicate you are starting a ‘New project’ and will fill in the Project name, the Production environment name (USE 'main' for our CI/CD workflow approach rather than master, prod, or whatever else you might call it), and select the geographic region for your location.
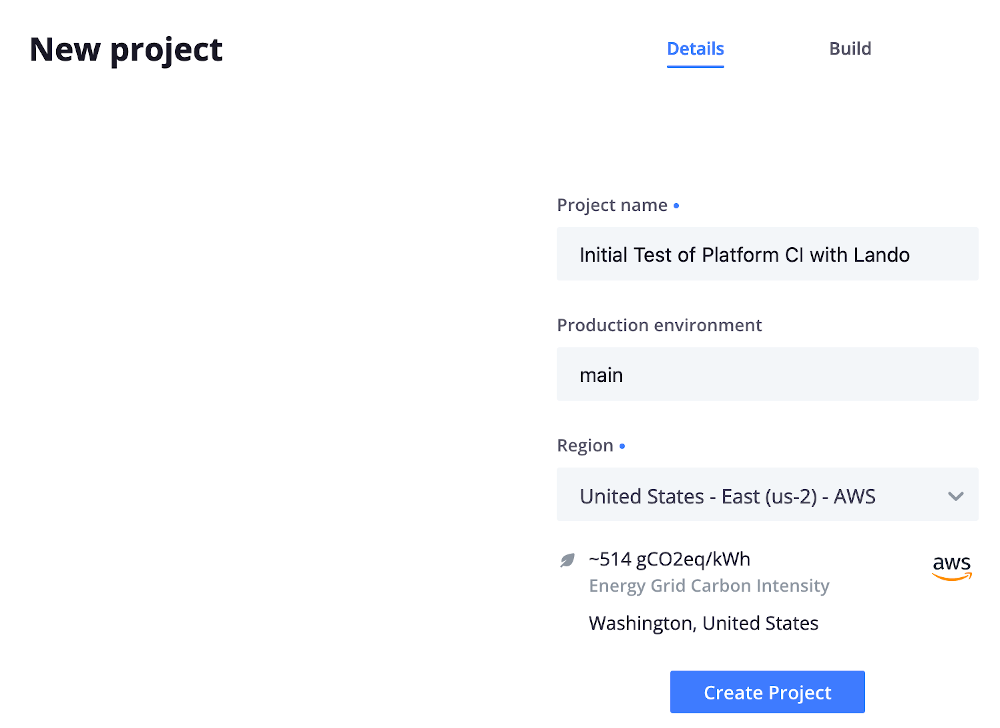
They don’t want to surprise you on costs, so you will be shown the pricing plan. But if you are just starting out to see how it goes, you will be in the ‘free trial’ and don’t even have to put in any credit card or that type of information. So just hit ‘Continue’.
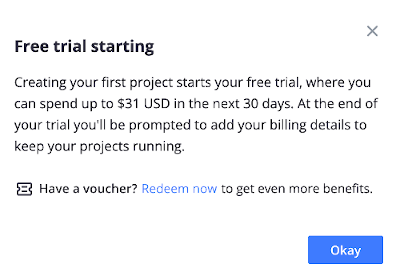
They will tell you that your ‘Free trial’ is starting. And basically you have 30 days to work with the Platform.sh host to see how you like it. Your project is being saved and assuming you are happy, you put in your billing details at the end of the trial to keep it running. WARNING: DON'T LET A PROJECT YOU WANT TO SAVE HIT THAT 30 DAY PERIOD WITHOUT CONVERTING IT TO PAID OUR YOU MAY NOT BE ABLE TO GET IT BACK.
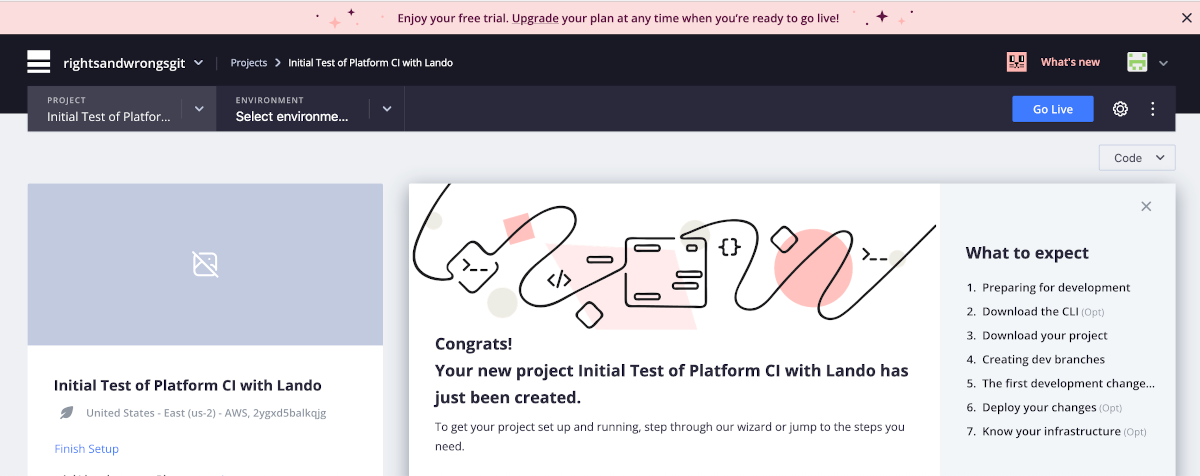
At that point your new project is actually building. Remember, you are using a Drupal template supplied right by Platform.sh to do that build. The template is driven by a Composer file that coordinates the installation of all the package parts into a container environment; Docker is underneath all this but you don’t have to specifically know Docker since the system is all set up for you.

If you look back at the overall main screen you can see at the top menu bar who you are; since I used my GitHub account as how I signed up you see that noted; “rightsandwrongsgit”. Yours will show your user name in that spot. Then you see the Project we started “Initial Test of Platform….” and a box to select the ‘environment’ or branch; we only have ‘main’ that we started with at this point (and we don’t want to create more just yet).
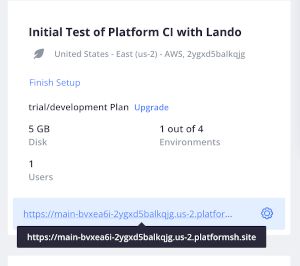
As you look further down the page, on the left you see our Project, that it is on a ‘trial/development plan’ with an option to Upgrade button, the Apps & Services running in our container are graphically shown. On the right you see we just have the one environment running; ‘Main’.
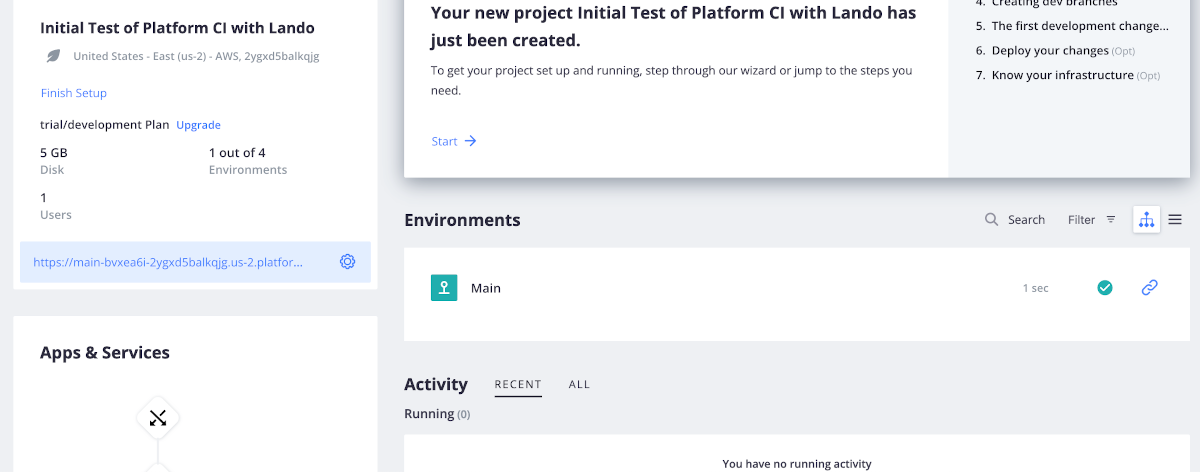
What you care about at this point is at the bottom of that left box with the Project name, Plan, Geographic location… You see a URL at the very bottom and you are going to want to open that in another browser window (‘Control-Click’ on a Mac).
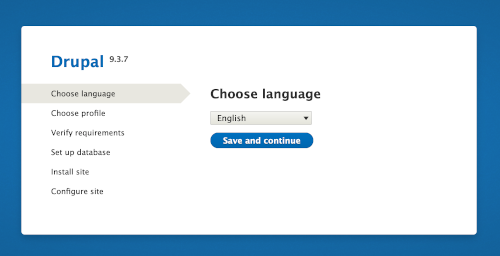
ChaChing! When you open it, you sort of see the beginnings of your Drupal site running on the Platform.sh host. We are going to have to do the Drupal site set up steps but the actual host environment is already running. Don’t freakout if it looks slightly different since Drupal routinely updates versions for improvements.
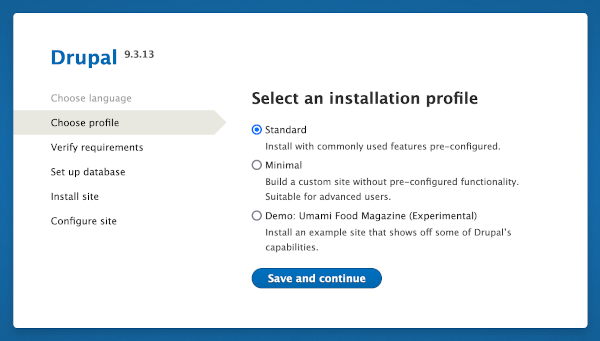
Select your language, then ‘Save and continue’…
Choose profile; most likely ‘Standard’ if you are aiming to establish your own site with CI/CD workflow steps…
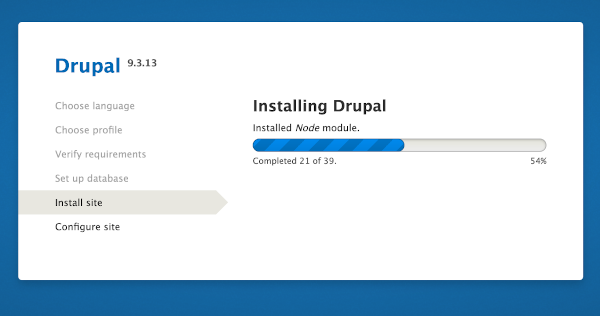
Here is where that container based approach and a starting template really pay off. You will see the install process has skipped the ‘Verify requirements’ and ‘Set up database’ steps because these are already handled. So just watched that ‘Installing Drupal’ bar whiz by…
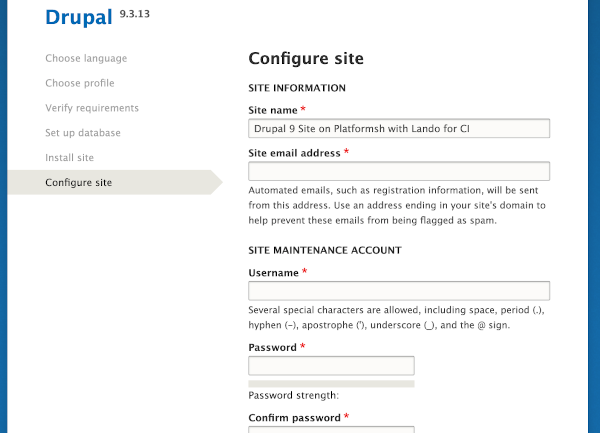
Tell the system your Site name, Site email address, and the your basic site credentials. These things can be edited within the site under the ‘Admin’ menu once you start using your Drupal site; so don’t freak over doing this step.
The browser address Platform.sh pointed you now shows an actual Drupal website running on a host. And notice you are also logged in; see the upper right corner of the page. Make sure you record your 'Credentials' from what you put in on that last step. You will need these next time you want to log in.
You actually have a hosted Drupal site on the internet at this point. If you you gave someone else that web address they could also get to it. Later you might share such an odd address for your website’s ‘staged’ environment to allow a client review as a testing step. Eventually you will assign a DNS (Domain Name System) address to the Platform.sh hosted site and make your fully live site have a typical address. More on that later.
You could also actually go into the hosted website with your administrator credentials and work directly on it; BAD IDEA. That is NOT something that is recommended because you may mess things up and not have a good way to back out of your problems; and you likely know that as one reason you are reading this setup documentation to do some amount of a CI/CD type of process. Plus, you probably know that working on your local machine is faster, or more comfortable than working on the hosted copy directly.
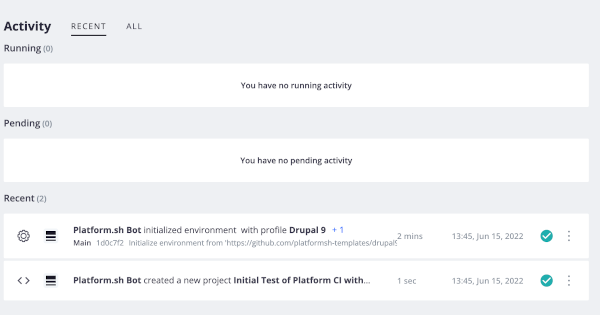
We have our Drupal site running on Platform.sh and we really need to think of that, its ‘main’ environment specifically, as the ruler of all, the gold standard… If we look back at the Platform.sh site page where we started we will see the site we installed under the ‘Activity’ section.