Guide to Profitable Sales

(Drupal Core currently on 10.1.6)
Notes for the project author, not necessary for normal users. Explains doing updates to the Lando, Platform.sh, Drupal CI/CD workflow base project provided for easy-start Drupal sites.
Before you start, know the Platform.sh template versions and, your own Drupal Project versions.Go to the Platform.sh “current” version deploy options on their site; it will likely offer more than one so confirm what your intended upgrade path plan is (e.g. Drupal 9 to Drupal 10, some minor 10.0 to 10.2 upgrade, etc.). Don’t hit the deploy button there; rather, follow the link they provide to the Git Repository for that version.
Drupal: On Platform.sh
Pop into the composer.json file for the upgrade target in that Git repository and in it should find lines near the top that look something like this …
"require": {
    "composer/installers": "^2.0",
    "drupal/core-composer-scaffold": "^10.0",
    "drupal/core-project-message": "^10.0",
    "drupal/core-recommended": "^10.0",
    "drupal/redis": "^1.6",
    "drush/drush": "^12",
    "platformsh/config-reader": "^2.4"
These are showing the Drupal project versions. Note the ^ symbol is implying… “Compatible with version”, will update you to all future minor/patch versions, without incrementing the major version. ^1.2.3 will use releases from 1.2.3 to <2.0.0
So you know the Drupal version is 10, up to but excluding 11. You know the Drush version is 12 up to but excluding 13. If you want to see the specific minor version being used by Platform.sh in its templates you can go to the composer.lock file and do a search for “drupal/core”.
Host environment: On Platform.sh
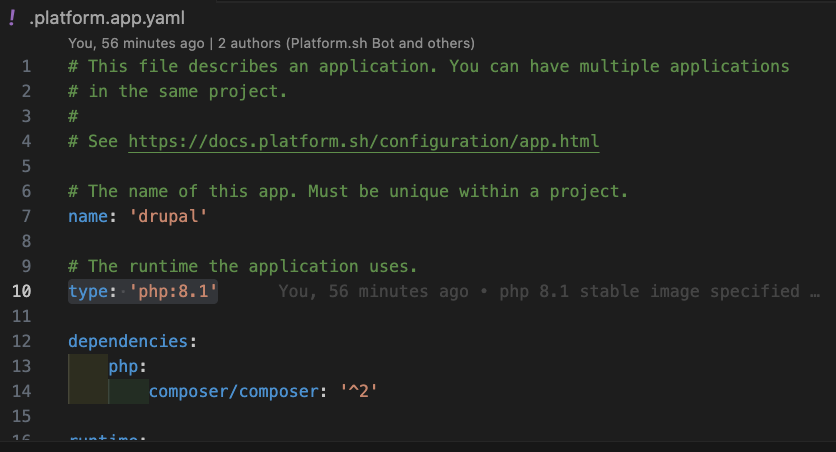
In that same Git repository, look for the file .platform.app.yaml and open it up. You should see lines like these…
# The name of this app. Must be unique within a project.
name: 'drupal'

# The runtime the application uses.
type: 'php:8.1'

dependencies:
    php:
        composer/composer: '^2.1'

runtime:
    # Enable the redis extension so Drupal can communicate with the Redis cache.
    extensions:
        - redis
        - sodium
        - apcu
        - blackfire
You see that the php version is 8.1 and that the composer version is 2.1 up to but excluding 3.
Click here to do a PHP version update
Drupal: On Lando
Logged into the Drupal GUI, Check under “Status report”: /admin/reports/status.
While in your VSCode Terminal at the command line run drush core:status
Host environment: On Lando
You shouldn’t have to worry about this because Lando inherits the environment settings directly from the .platform.app.yaml settings. The except to this is if you have inserted any overrides in your .lando.yml file; go check by looking at it if you need.
Update Summary Steps
Back up on Platform.sh before you do any updates.
- Back up a clean copy of the most current project ‘main’
Make Clean ‘staged’ & ‘develop’ working with VSCode & GitHub
- ‘Git Clone’ a copy of ‘main’ to Lando
- Create from ‘main’ a ‘staged’ and sync with host
- Create from ‘staged’ a ‘develop’ and sync with host
- Work updates on ‘develop’
Initialize Local
lando init --source cwd --recipe platformsh
Permissions and Time
- Open directory and file permissions
chmod u+w web/sites/default - Set extra run time for the many and large files involved
lando composer config --global process-timeout 2000
Get Your Database
- Run
lando pullNeed details?
Cache’s set to enabled
- Run
make update_project - Run
lando rebuild - Check the local running project at the URL provided
Make UPDATES; do it in your local lando copy
- Make updates… (e.g. like to Core here)
- Run
lando rebuild, check the updated local running project URL to confirm you got what you wanted - If it all passes, run
make development_projectto set all the cache’s back to development mode - Commit/Sync the Lando ‘local’ copy
- Check the project GitHub repository to confirm the ‘develop’ branch update
Check the Platform.sh build of the ‘develop’ branch
- Once done with doing and intial testing of updates on the platformsh ‘develop’ branch go to the ‘staged’ branch and under the VSCode activity bar click on Source Code; click on three dots, go to “Branch” option and select “Merge”, fill in command palette box with the “merge from” question with ‘develop’
- Let the ‘staged’ branch build on Platform.sh, reactivating if needed, and follow the branch URL to see the running branch to conduct further testing before repeating the process to updated ‘main’ from ‘staged’
Merge your way back up to get the updates you made into ‘main’
You did your update on the ‘develop’ copy of the site. You then merged it with ‘staged’, confirmed functioning there, and merged to ‘main’. Check here for a reminder of ‘How to’ do that.
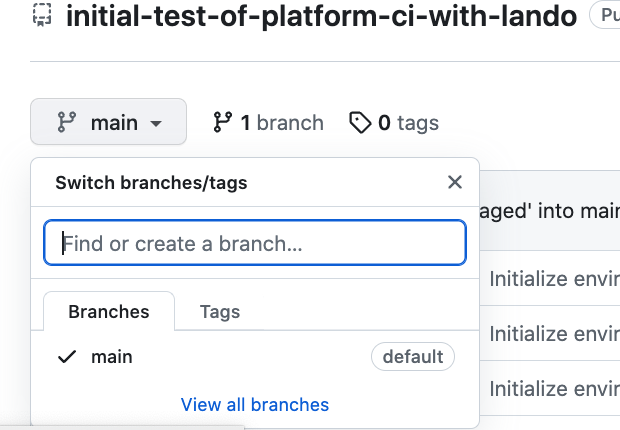
You can run a clean up on the ‘develop’ and ‘staged’ branches by eliminating them once ‘main’ is updated and secure. That saves you Platform.sh environment charges for stale branches you not longer logically use. Next time you do and update, you are going to grab the ‘main’ as the starting base and create fresh ‘staged’ from it; then fresh ‘develop’ from that. Remember, to discard unneeded branches you just go the the project main branch and click on the “View All Branches” option where little trash cans can be clicked to do the deed.
Quick Extras
Update Other Parts beyond Drupal
Update php Version
Update Drush Version
Update Composer Version
I screwed up, back me out
Crosscheck General Drupal Requirements
Update Details
Your “Secure” Foundation
If you have any pending work that should be retained in your production website, you will want to ‘Git Sync’ your way from ‘local’ to the host ‘develop’ environment and then merge ‘develop’ up to ‘staged’. Since you are using the Config_Suite module and have set up automatic exports and imports between these environments, these initial steps are pretty automatic. Complete your testing on 'staged'.
Merge to ‘main’
Once you are satisfied with your testing on ‘staged’ you can merge that to ‘main’. Your clean production environment is the starting point.
Start with a Backup
It makes sense to be sure you have backed up on Platform.sh before you do any updates; even the well tested ‘staged’.
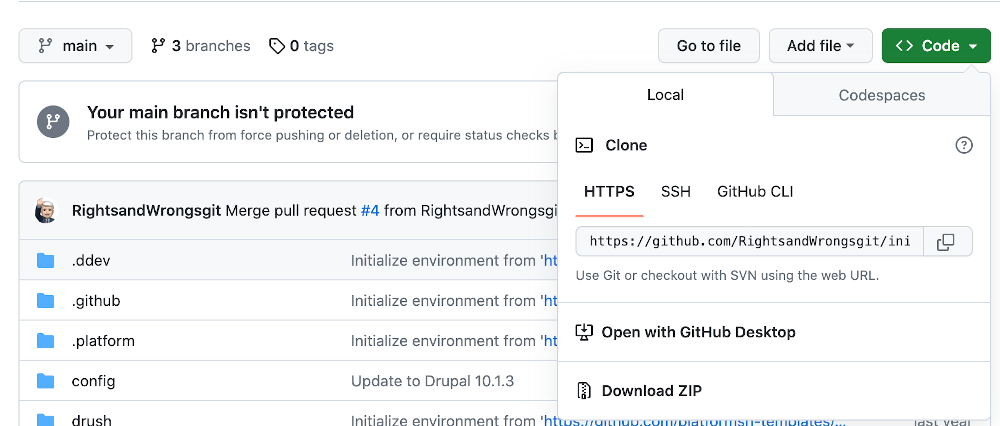
If you want to be extra secure at any time, you can also independently backup your source code. Remember, this is NOT securing your content, just your source code itself. Recall you have that in GitHub and if you go to your repository, click on ‘CODE’ and under the “Local” tab chose “Download a Zip” you will have a copy of your code that you can tuck away on backup drives/services.
Make Clean ‘staged’ & ‘develop’
Do NOT create branch environments directly in Platform.shSince we have an integrated GitHub:Platform.sh setup, the correct way to create branches for a project is on GitHub. These will subsequently appear on Platform.sh because you have an SSH connection between the two. We use VSCode as our IDE and this interface, with the correct extensions installed makes this easy.
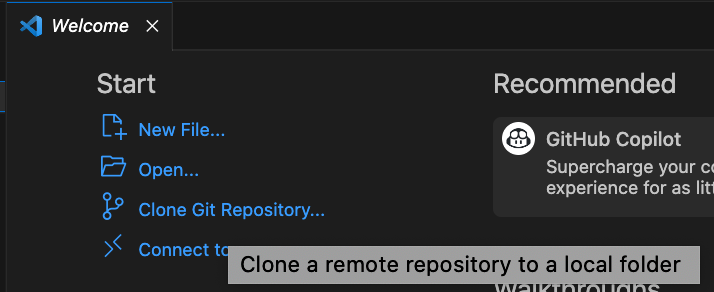
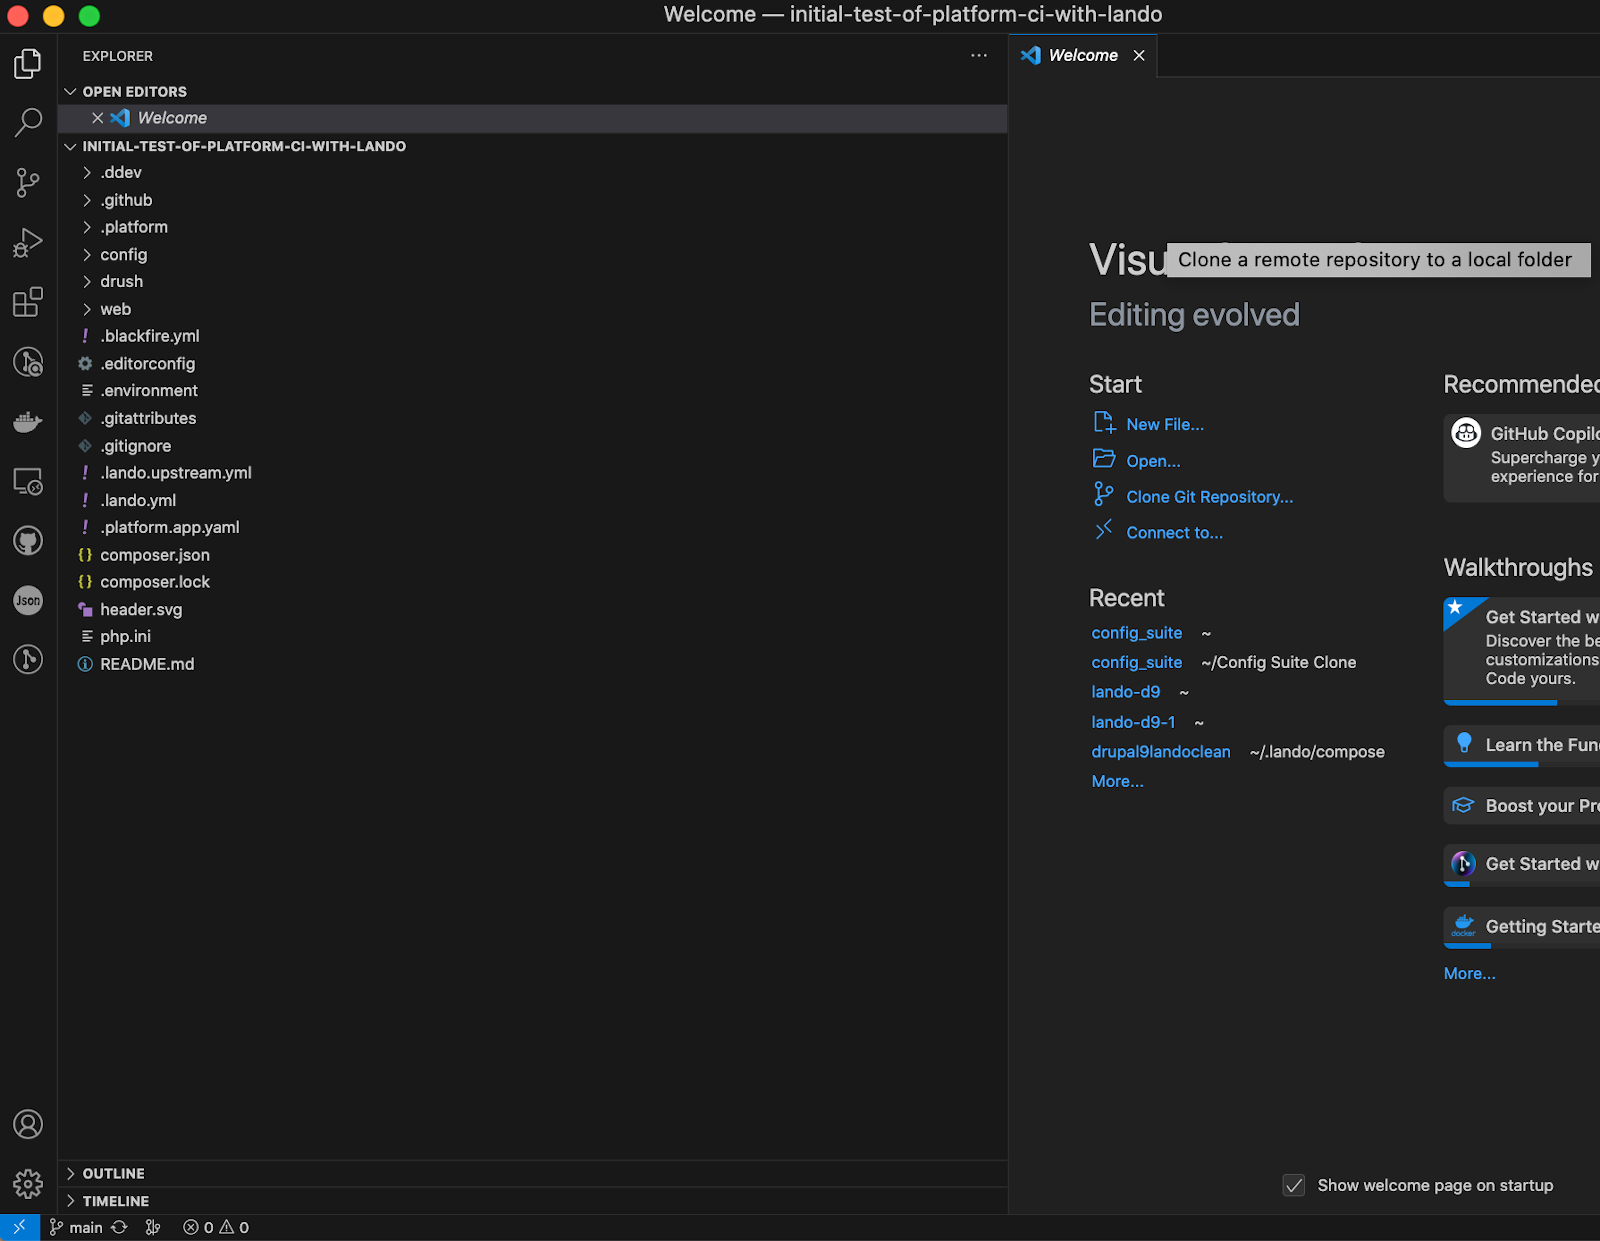
One of the options when you start VSCode is to “Clone Git Repository”. If that doesn’t show, hit Command-P and the little window at the top will appear to let you start there.
At the top of VSCode the command palette opens to list the remote repositories you have and you can select from the list or type one in directly.

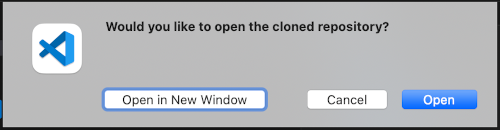
You are offered the option to open the project. Click “Open” and you will see the project with all it subdirectories in the left panel.
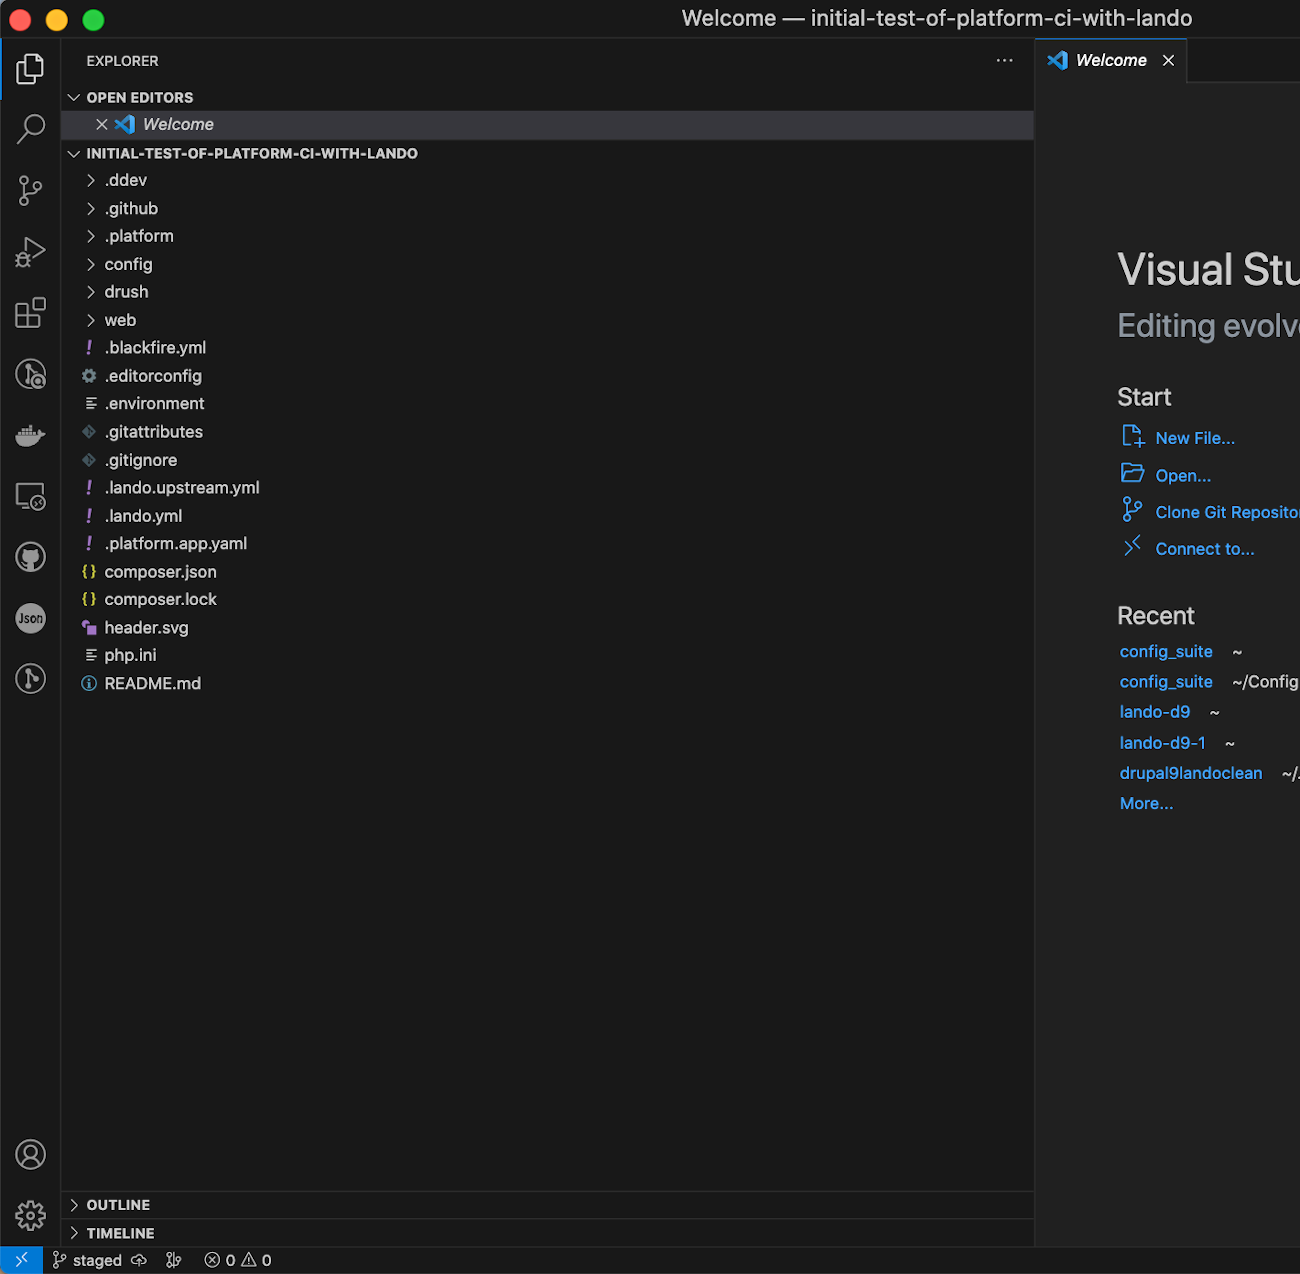
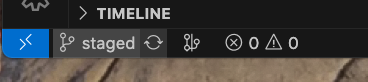
It should look something like this. Note specifically the lower left corner and you will see which branch you are on. Since you previously brought everything current in the production ‘main’ branch, that branch is the only one logically available to cloed.
Go click on that word ‘main’ and the command palette should pop open. Otherwise do a “Command-P” to open it and start typing “Create…”. When that box asks you for the name of the branch you want to create type staged

You should then see the clone of your project is now on the ‘staged’ branch; see that lower left corner.
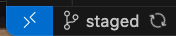
See that little cloud next to the name ‘staged’? Click on it. What it is telling you is that you have named a branch ‘staged’ but that it isn’t up on GitHub yet and the little arrow in the cloud sends it there.

Don’t be surprised if the cloud looks like it turns into a tornado and spins. With a project of any size, it take a while to get to the GitHub repository.
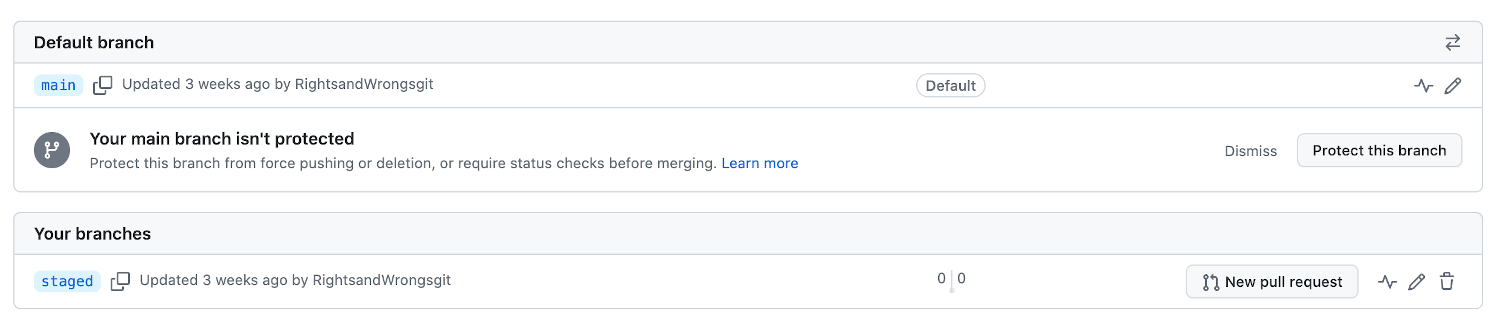
Open another window in your browser and go to GitHub. Click on your project in GitHub. Where it says “branches”, go pull down the list and at the bottom click on ‘View all branches’.

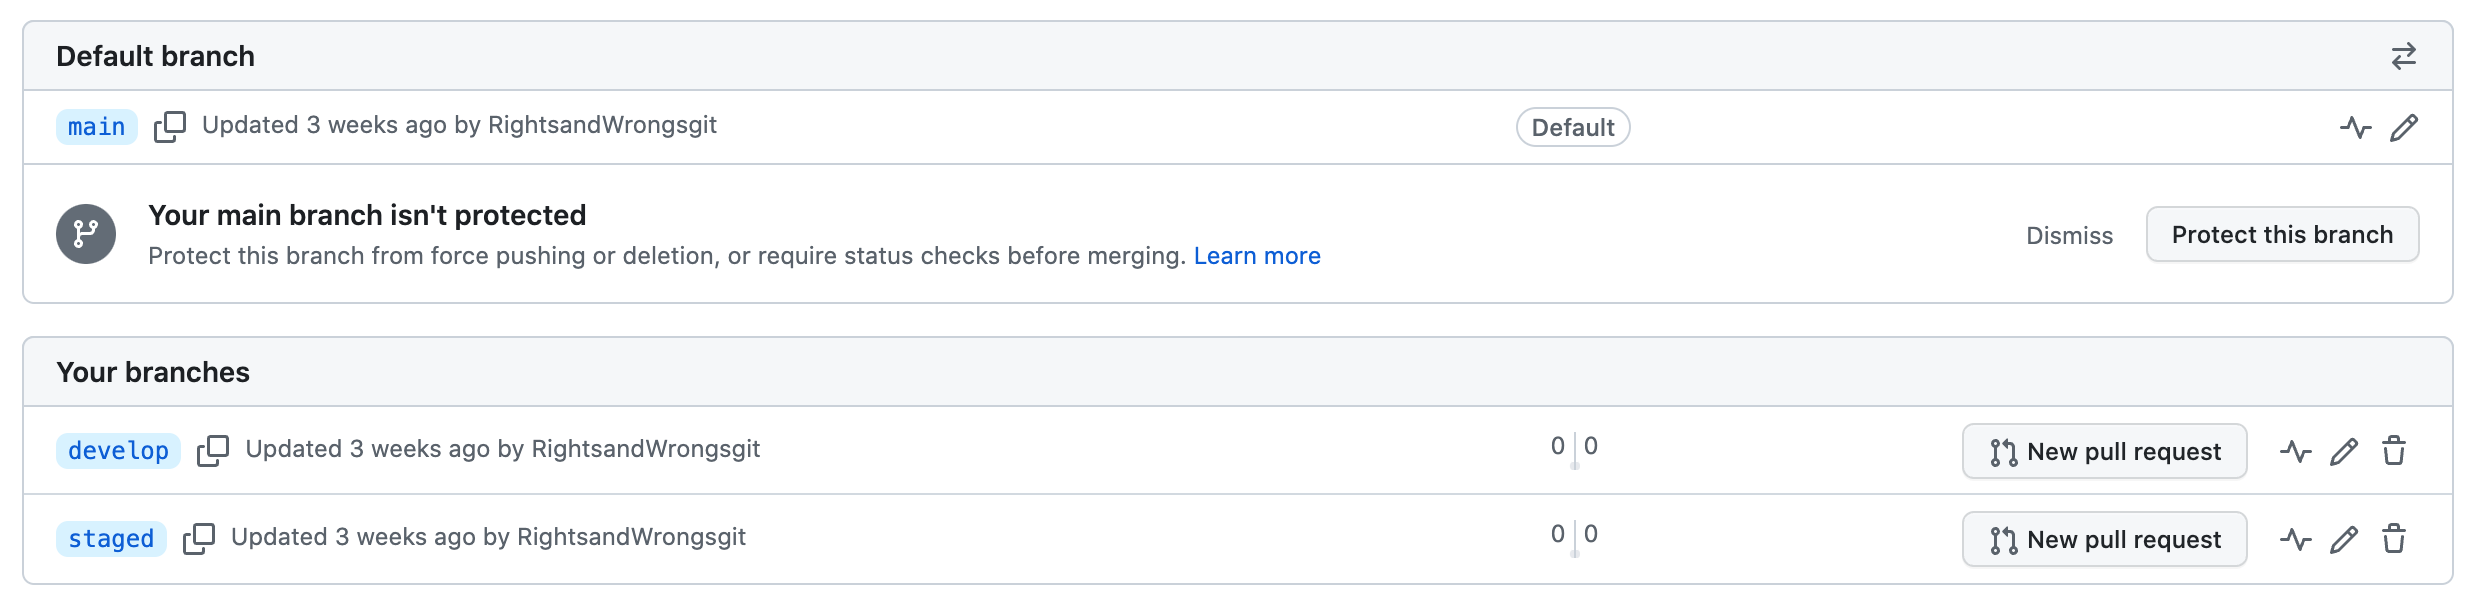
You should see your ‘main’ branch listed and now a second branch called ‘staged’.
Once you have the ‘staged’ branch made, you want to make the ‘develop’ branch. Here you need to be careful. The first option to create a branch will simply make ‘develop’ as another branch off ‘main’; a sister branch. You want ‘develop’ to be a child of ‘staged’. So you need to use the “create a new branch from” option.

You will get a command palette box where you will type ‘staged’ because that is what you want to be the parent.

You will then be prompted to indicate what you want to name the NEW branch and you will enter ‘develop’.

Now if you go back into GitHub and look at the branches you will see ‘main’, ‘staged’, and ‘develop’. The bad news from the list you don’t know if ‘staged’ and ‘develop’ are sisters or parent-child.
Over to Platformsh
Let’s go over to Platform.sh next and see if it tells us anything. First, if you click on the project you can see it has three branches of the names you provided. So the good news is the GitHub is updating Platform.sh as expected.
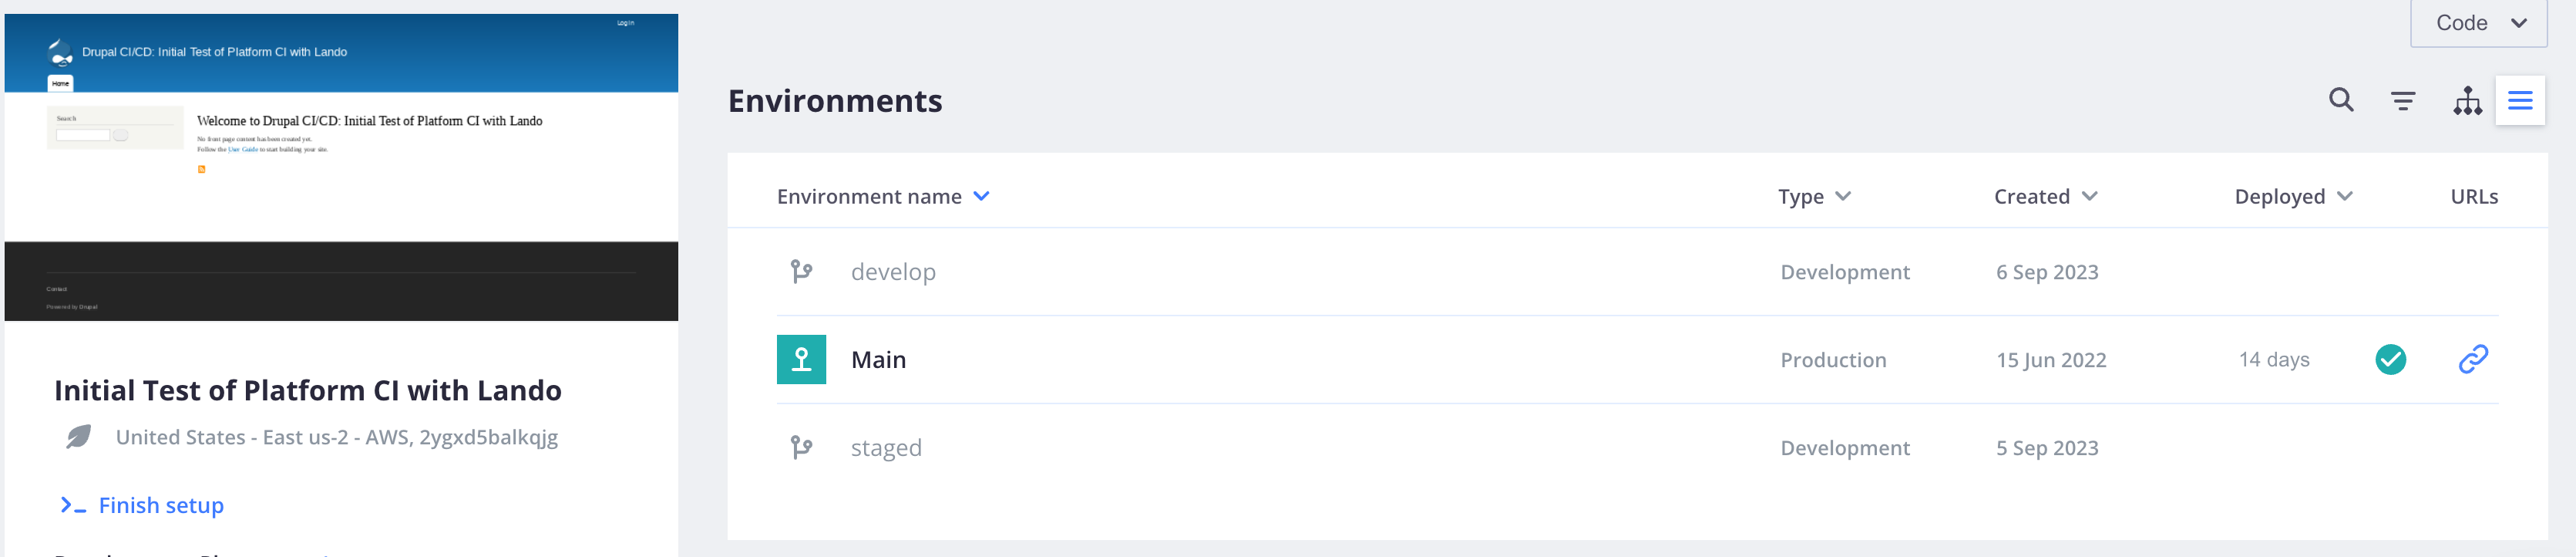
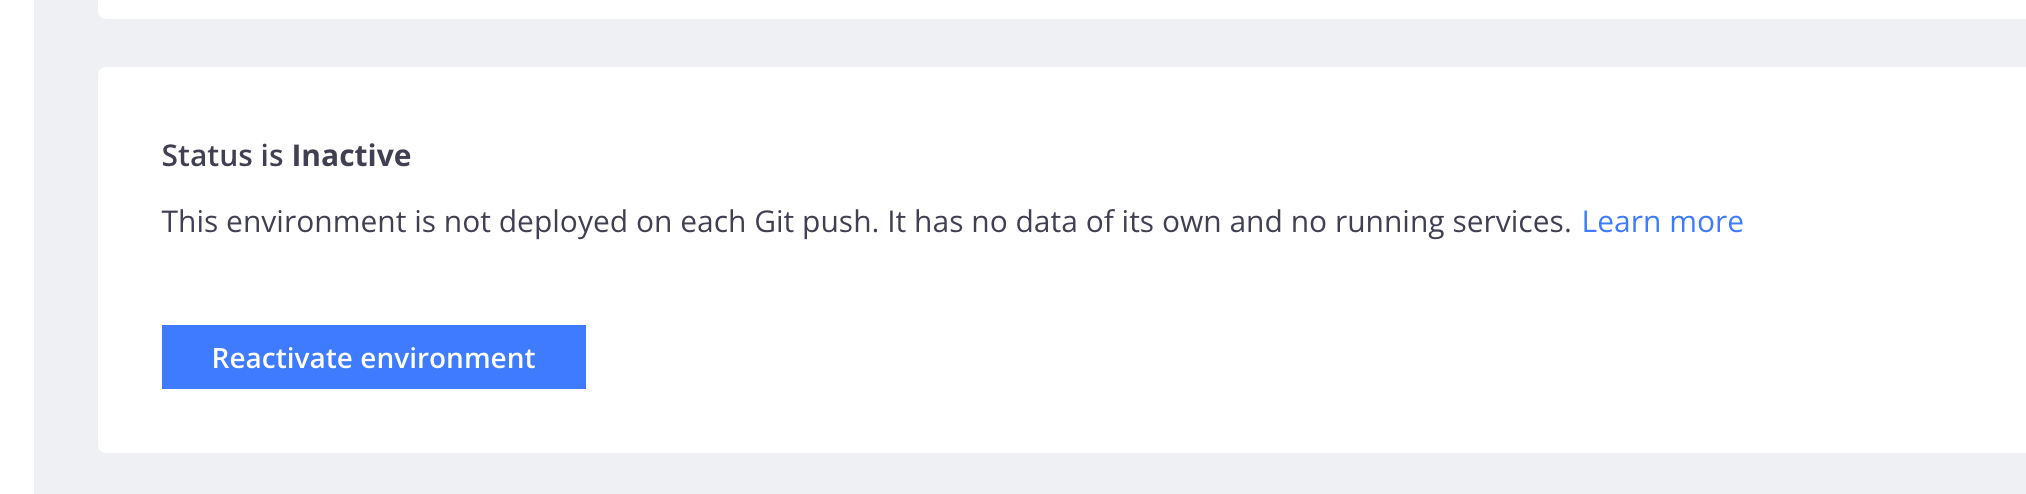
We see in the prior view that ‘main’ is deployed but that ‘staged’ and ‘develop’ are not. If it is a first time fresh action it is likely that all three are deployed. But often you will be going back and doing this process for additional updates and old, inactive versions of ‘staged’ and ‘develop’ may exist. Even though you just brought a new one in from GitHub, if it doesn’t automatically indicate it was deployed, you may need to reactivate that branch on Platform.sh This is not a big deal, just click on the branch so you are in it, and go to that little gear in the upper right corner. Click on it!

You will see some options for the branch name, who the parent is, the branch type; if you edit any of these remember to hit save. But more likely all you are needing to do is scroll down a little more and you will see the reactivate button; click it! It takes a little while so don’t get trigger happy.
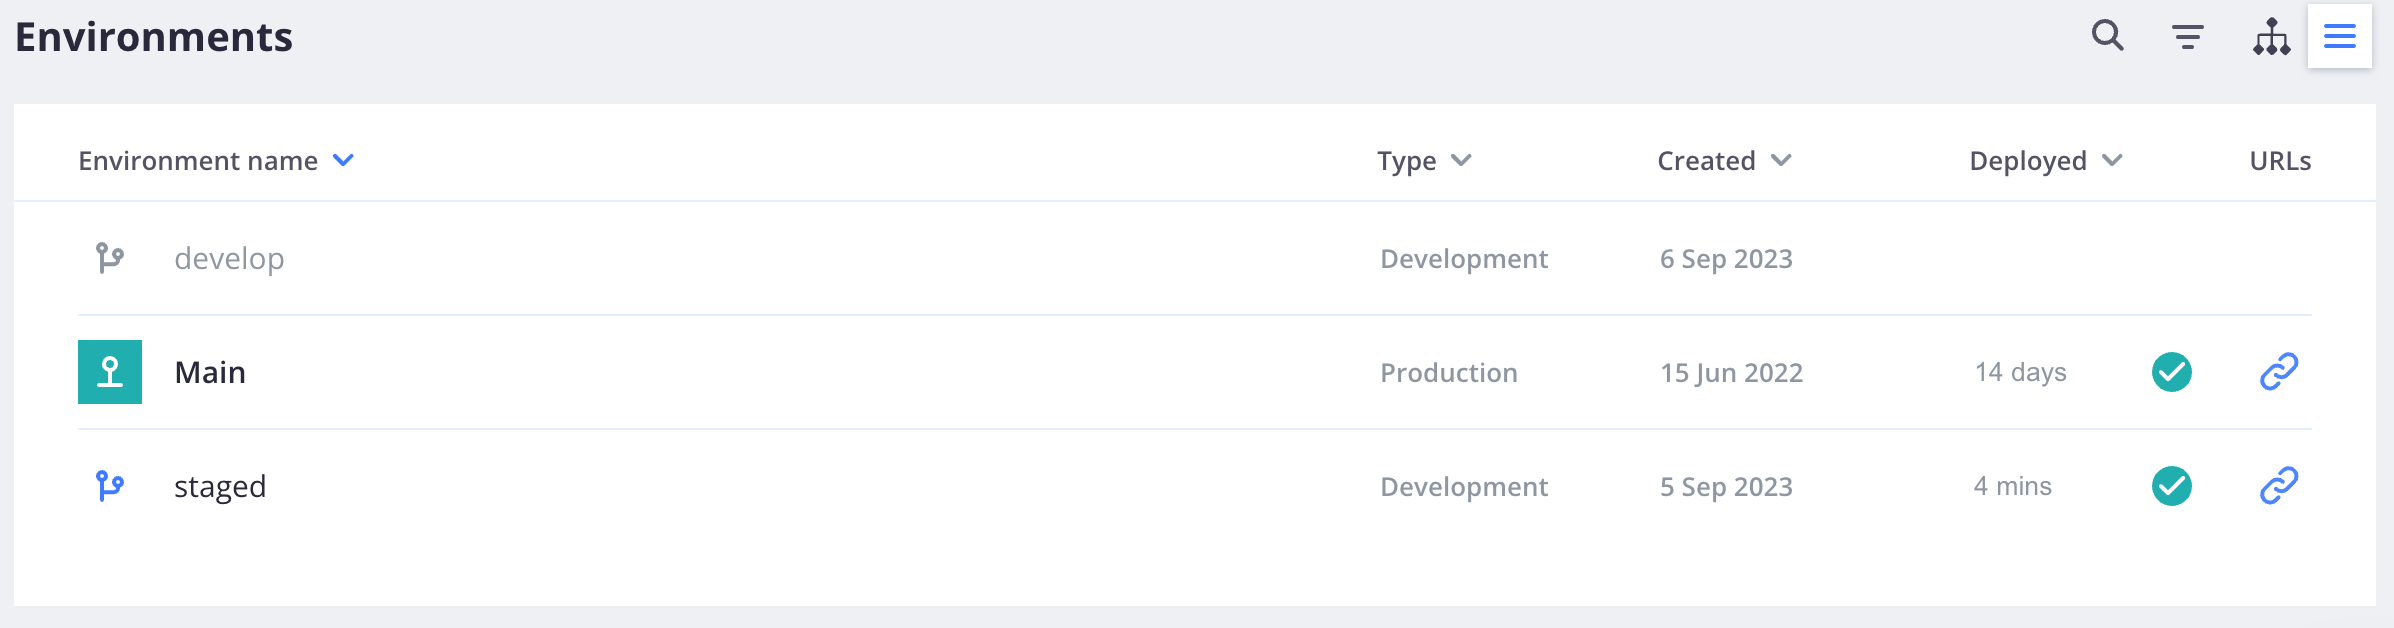
Once ‘staged’ is done you will see it marked deployed. Now select the ‘develop’ branch.
Click the gear in the up right corner again.

Reactivate the ‘develop’ branch.
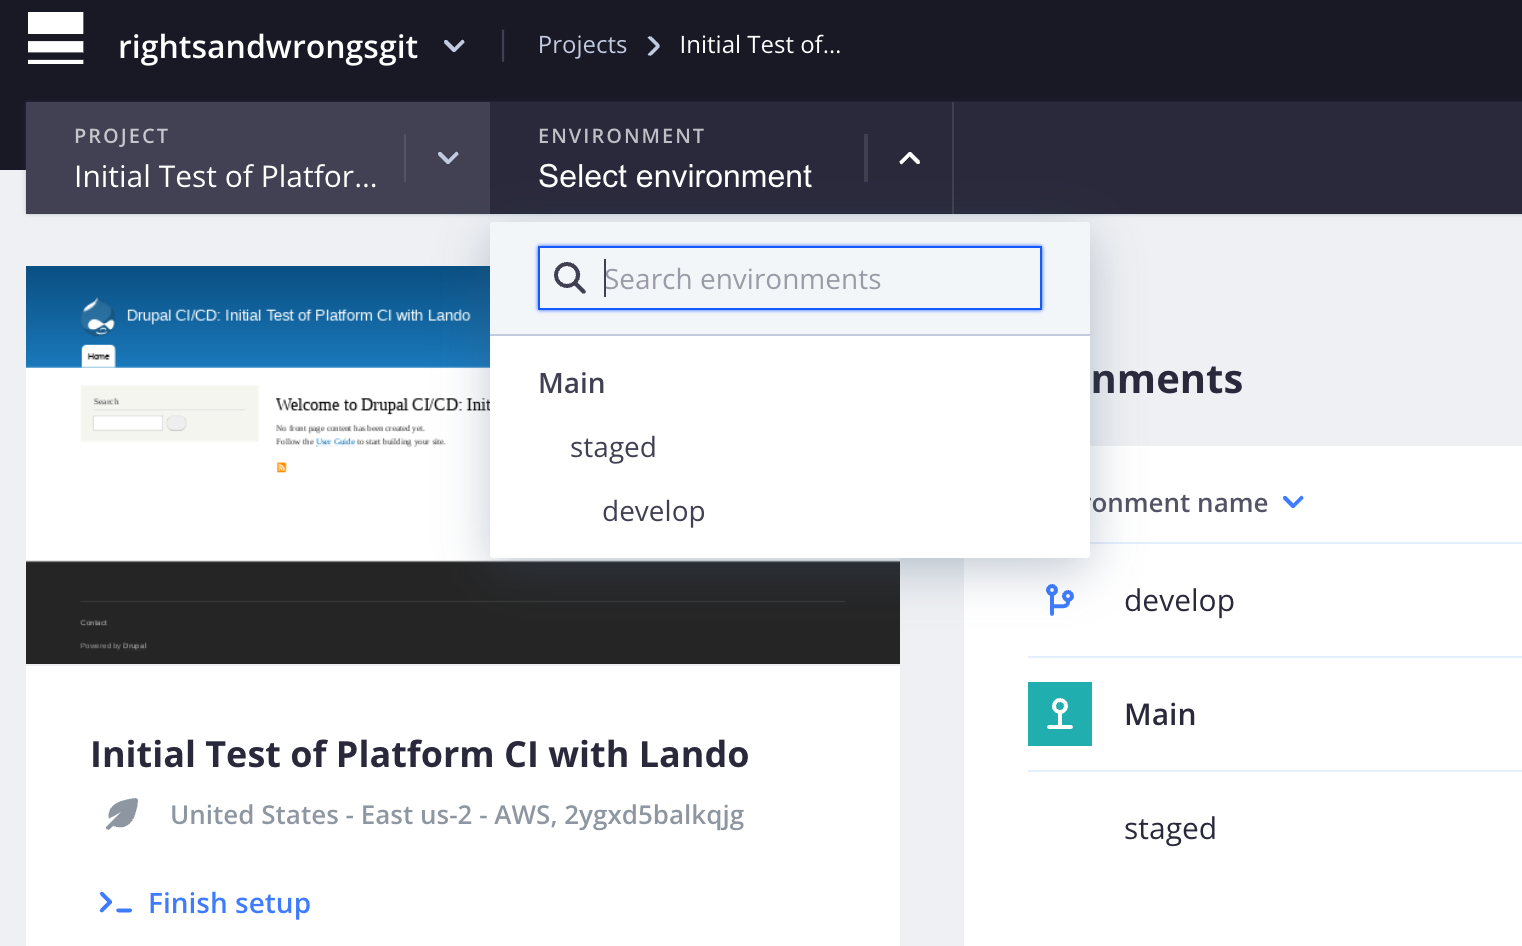
Go look at the front page of your project and pull down the environments list to see the hierarchy. ‘Main’ is the parent of ‘staged’ and ‘staged’ is the parent of ‘develop’.
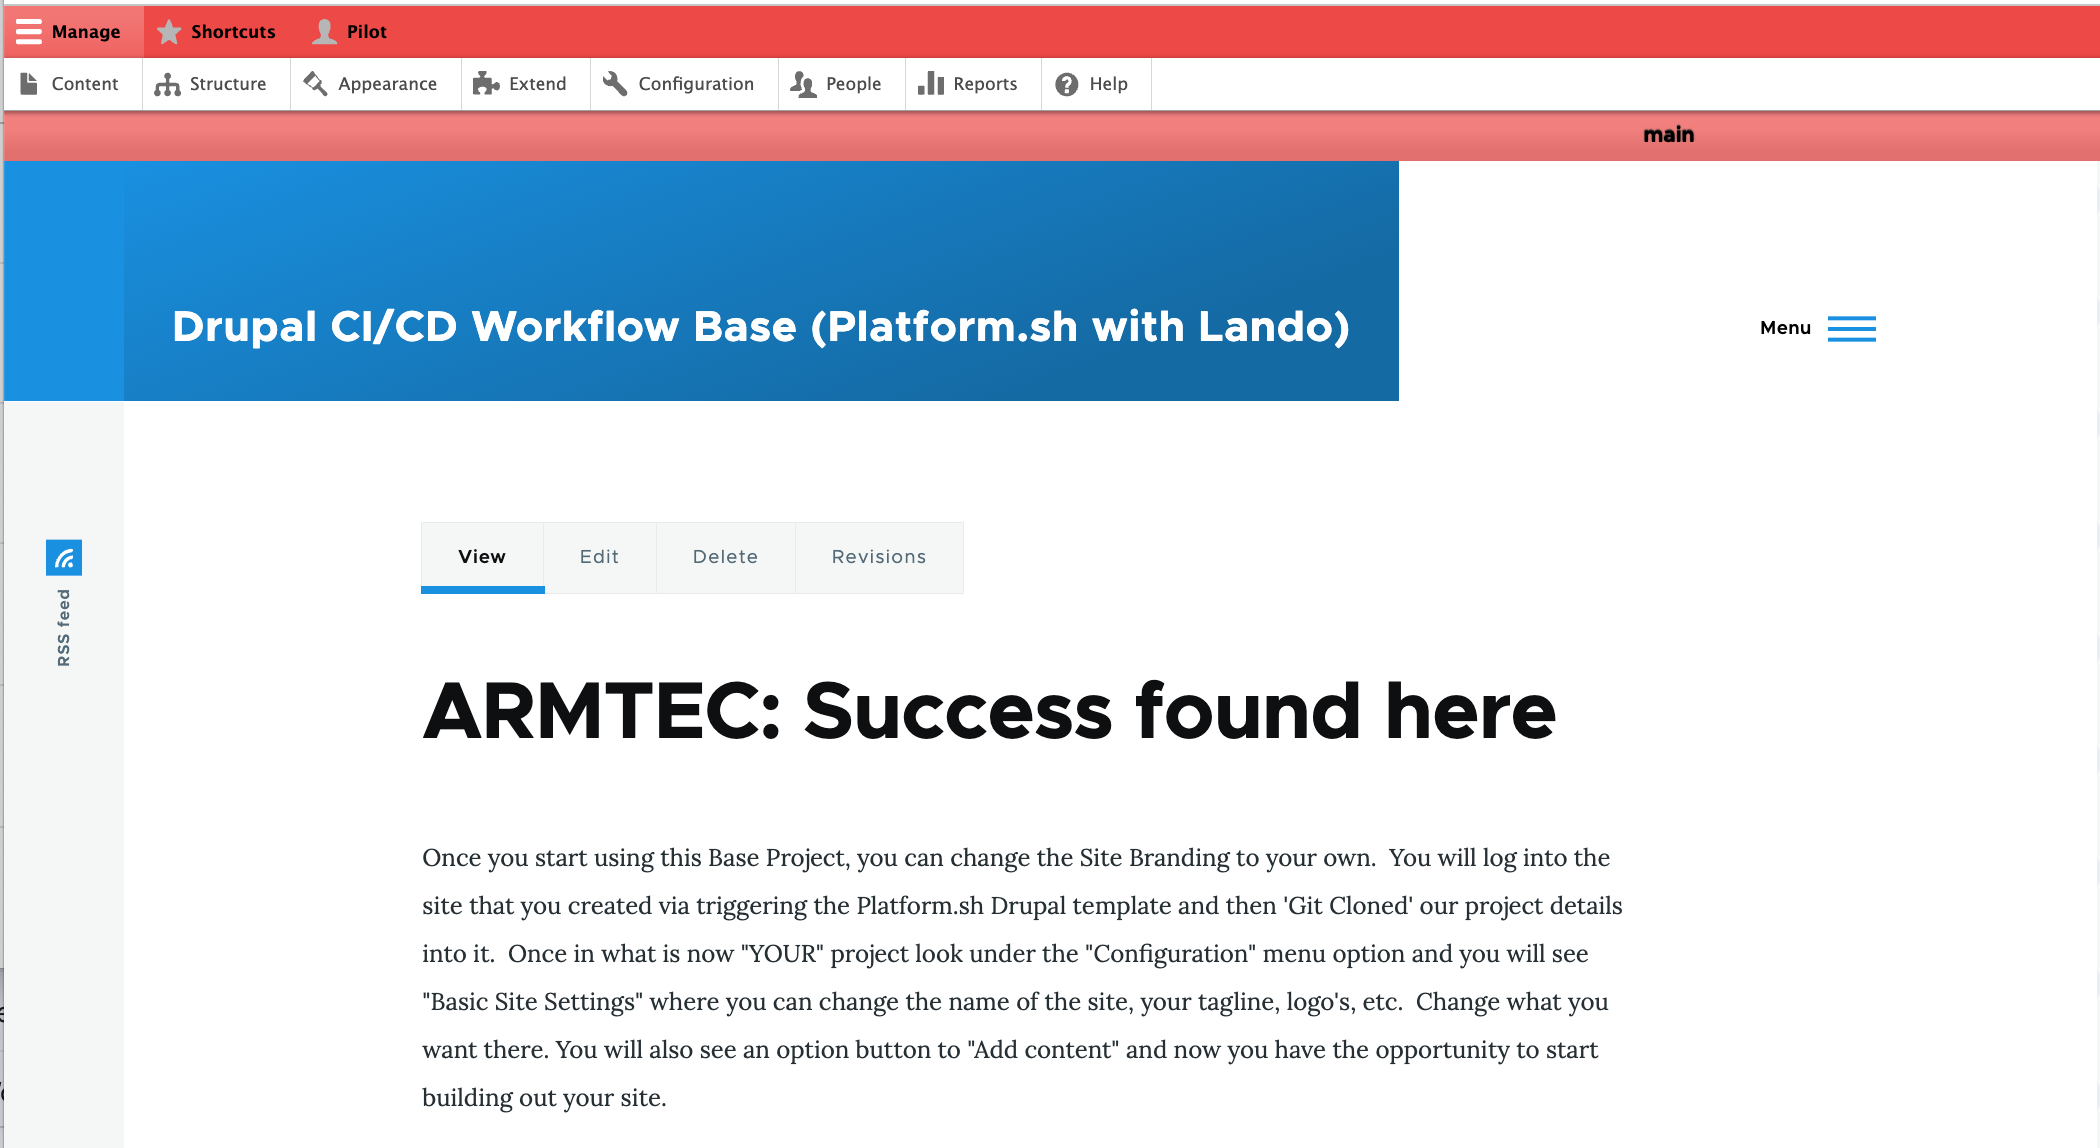
Now you can go to each of the environments and follow the link to that deployed site’s address. If you go to ‘main’ and log in, you will see the banner at the top indicating ‘main’ and the color RED to signal STOP… don’t be messing directly on this production version of your project.
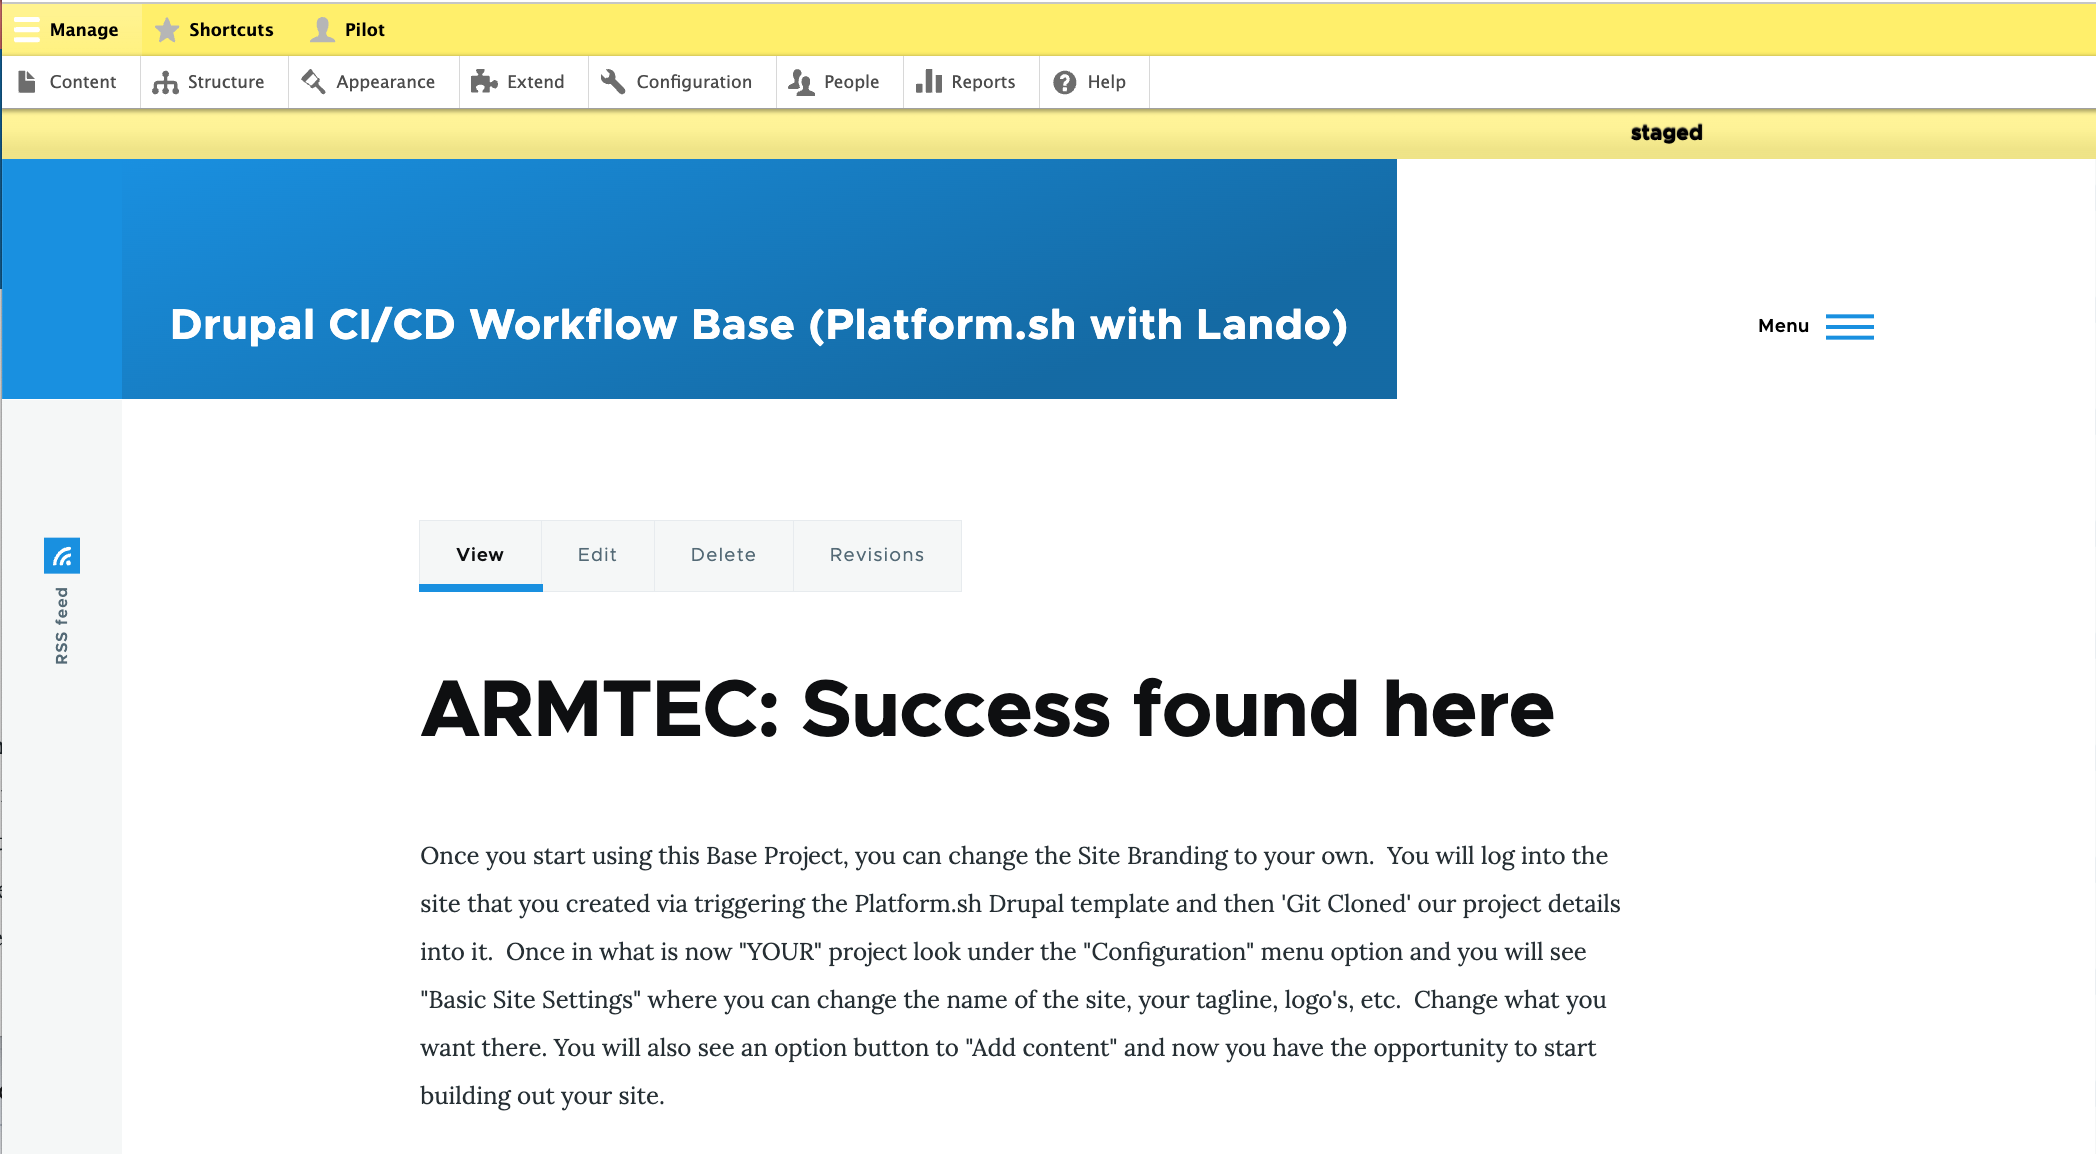
Go to the ‘staged’ environment, log in and you will see the name ‘staged’ and the YELLOW banner color warning that this is the testing site, so be careful with what you do.
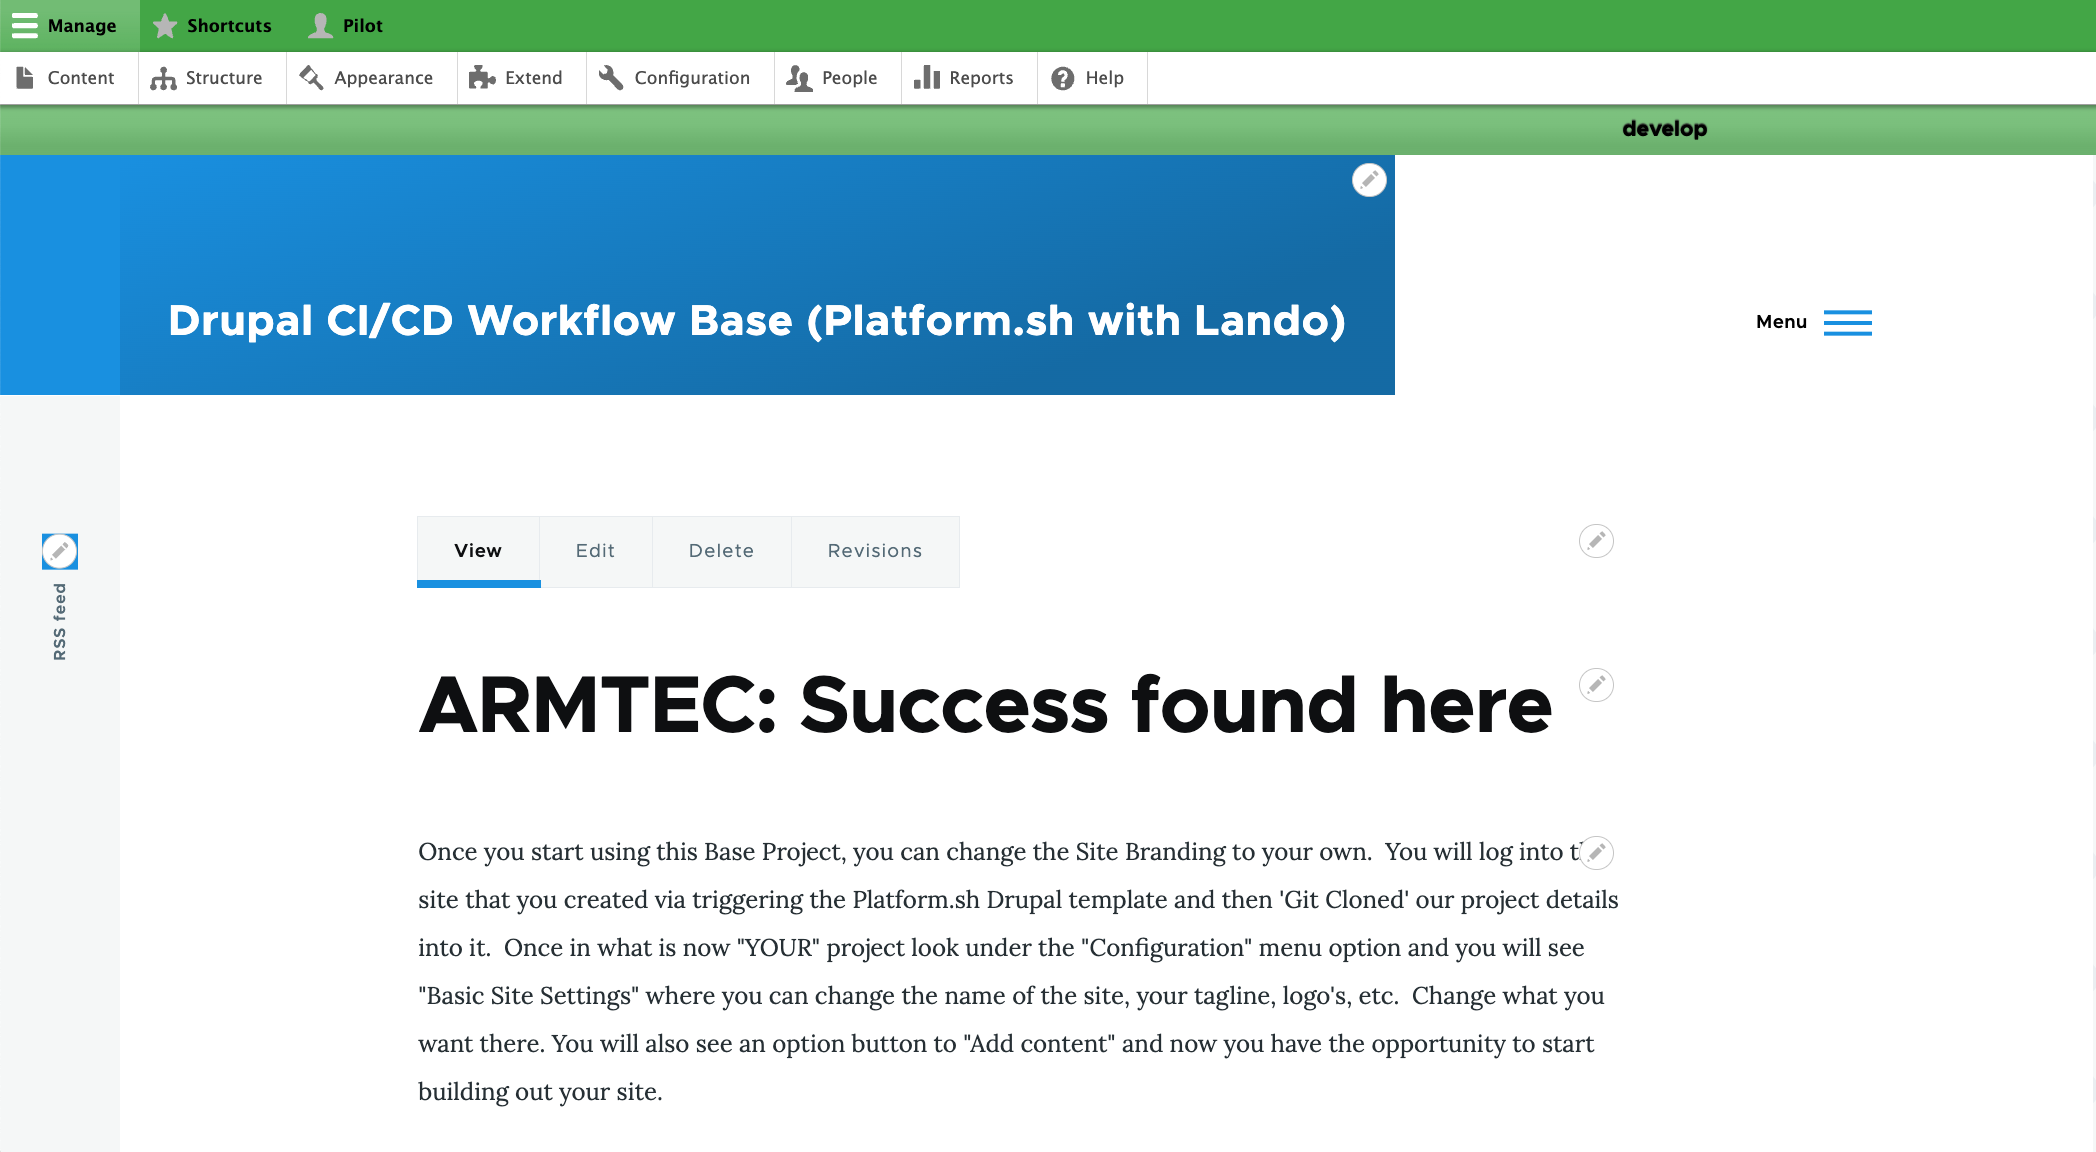
Go to the ‘develop’ environment and see that name with a GREEN banner to signal it is your safe work environment.
If you are NOT logged in, any of the site environments look normal; without environment name or banner colors
Initialize Local
You GitCloned your project to bring it to your local machine and you made you way to being in the ‘develop’ branch which, along with parent branch ‘staged’ and grandparent branch ‘main’ also lives on your Platform.sh host. Just because the branch files are local doesn’t mean they are running in a Lando container. For that you need to initialize the project. Make sure you are pointing to the top level of the files you cloned and are in the ‘develop’ branch; the informative command prompt we established makes that clear. You can do a lando init \ with the trailing backslash so it doesn’t immediately run and takes your next lines of direction. Then you input --source cwd \; again with the trailing backslash to allow the final command. Then input --recipe platformsh and hit return for these commands to all run.

If you are into a long one and done command line approach just type it all out line this.

Retrieve Database
To bring in the database isn’t hard but there is one trick you need to be aware of. Unlike move of the command line menu options where you use your arrow keys to select before hitting ‘return’, here you need to hit your space bar. Start out by just typeing lando pull and hit ‘return’.

in our case we want to import the “database”. And we want our mounts to be to the “/web/sites/default/files” location.

A whole bunch of lines will float by. Then it should come back with the “Pull completed successfully” reply.
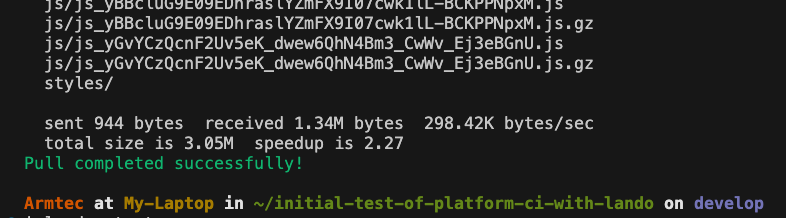
Given the run time you probably are reluctant but you really do need to run a lando rebuild at this point.

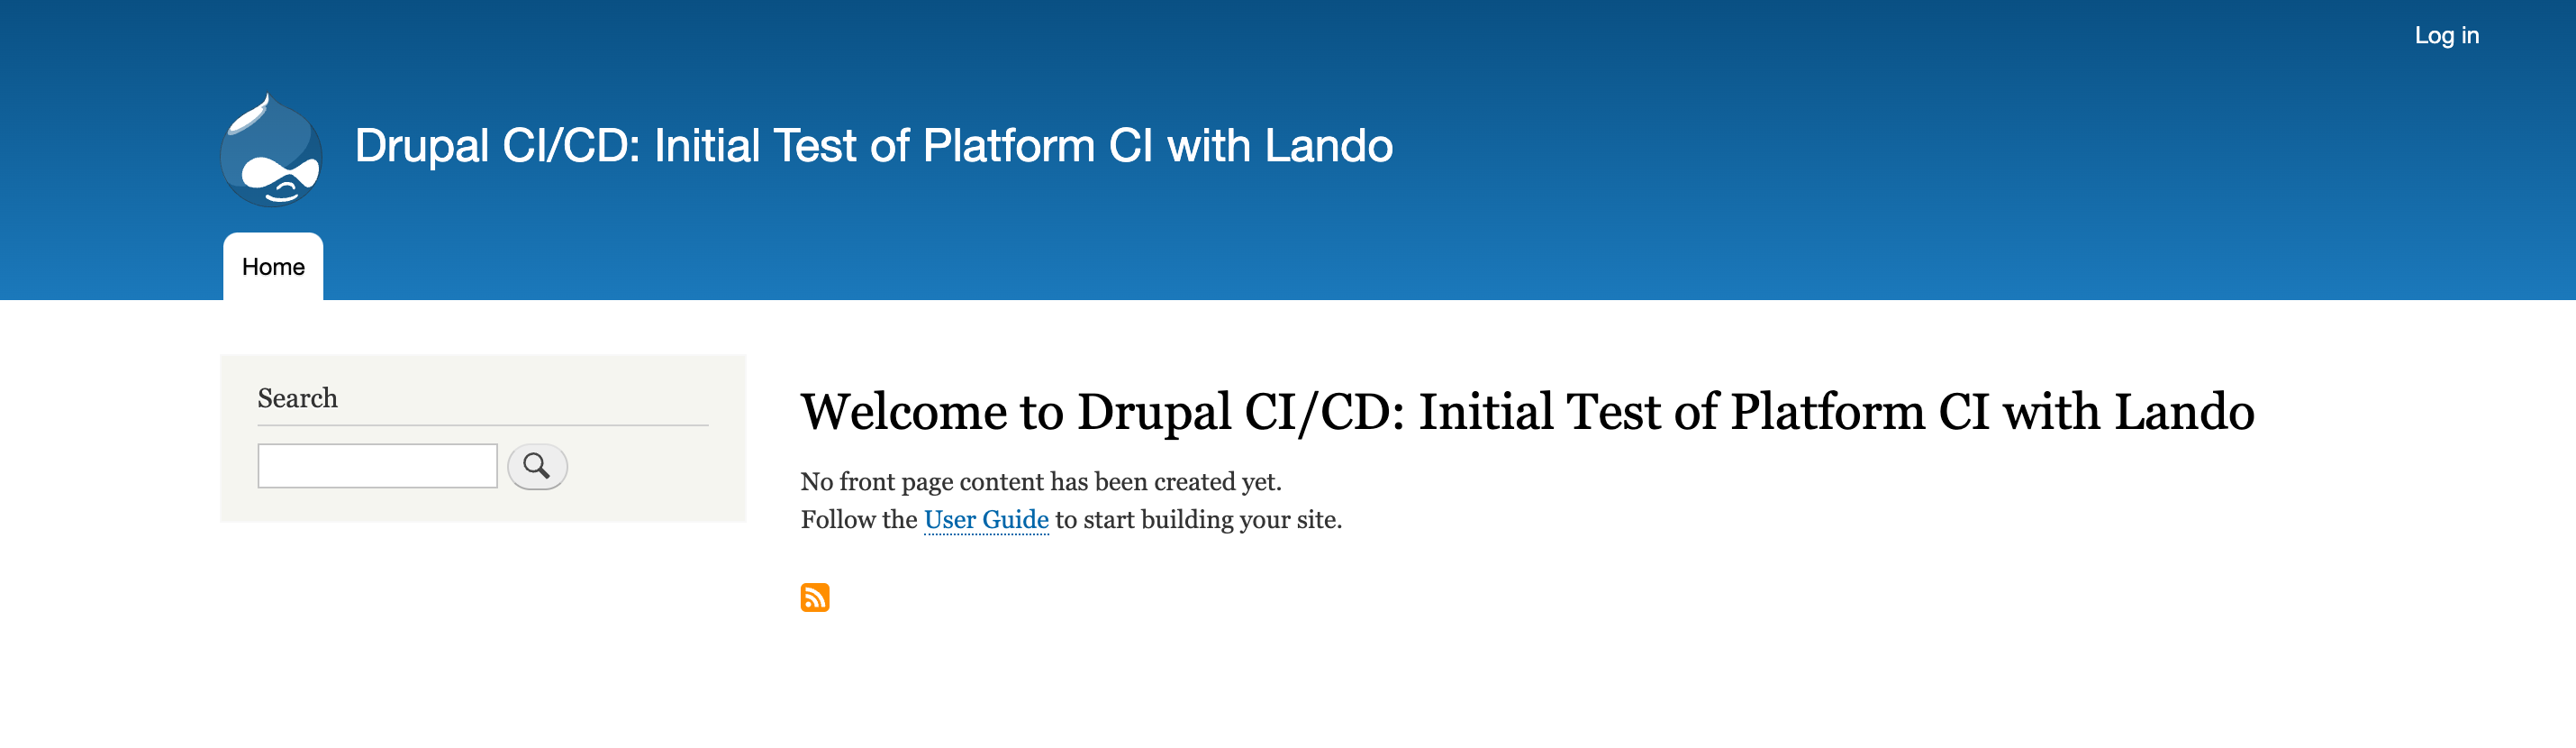
The good news is that now when it comes back your project should be available at those URLs lando spits back at the end. It may look something like this as a basic site page.
However, if you log in, it should give your a GREEN go ahead banner color with the environment name ‘local’ showing.
Do Your Updates
Merge up
Like a normal project coding enhancement your have done in ‘local’/’develop’, it needs to get to ‘staged’, be tested, and merge to ‘main’.
Once you have your work where you want it in your Lando ‘local’ copy, and have ‘saved’ the changes on your local drive…
Run lando rebuild
Check your work on the localhost URL lando provides at the end of its run.
In your VSCode IDE do a ‘Commit/Sync’ to move the local file changes up to the platform.sh host ‘develop’ branch.
Go into the Platform.sh Administrative screen and watch that the ‘develop’ branch updates. Refresh you browser until you see the branch update spinning wheel has finished. If the branch is bright, go into it and click on its URL to check it. If the branch is washed out, go into it and click on the cogwheel on the upper right check it says it’s parent is ‘staged’ and “save” and then run ‘reactivate’ the branch; then go into its URL to check it.
Go back to your VSCode IDE and change to the ‘staged’ branch in the lower left corner. Click on the Source Code icon in the lefthand activity bar and then at the end of the source code line click on the three dots. From the menu that opens, select “Branch” and then “Merge”. When the command bar opens and asks “Merge from where” tell it from the ‘develop’ branch. Then tell it the name of the branch you want to call it is ‘staged’.
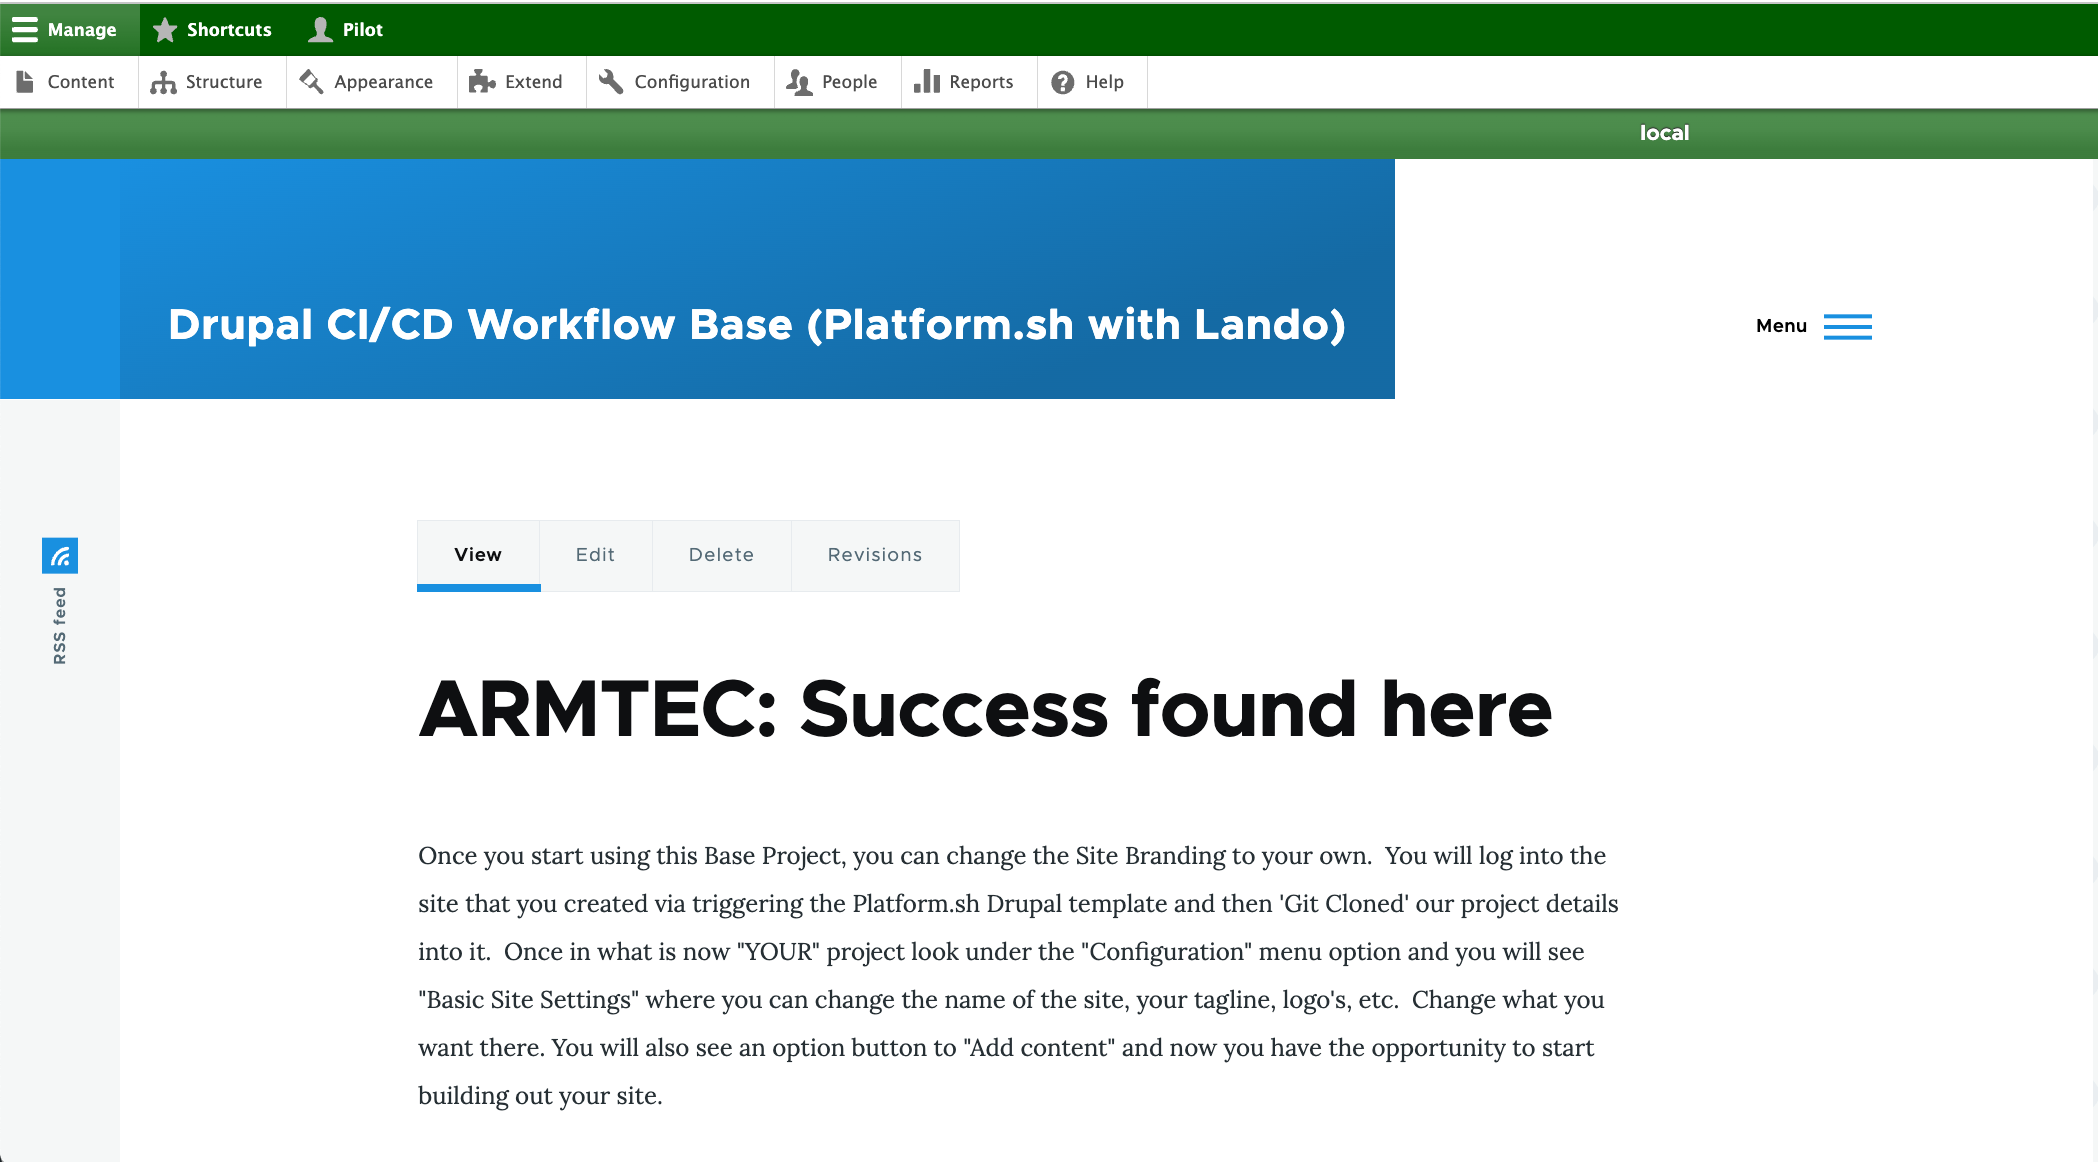
Go into the Platform.sh Administrative screen and watch that the ‘staged’ branch updates. Go into check it. It is possible that you may find an error related to differences between the underlying database and the configuration files. This just means you need to look under "Configuration/Configuration Synchronization" and run the update.
Update Tricks and Traps
Drupal Core Update
The BasicsAssure permissions
Make sure directory and file permissions are open.
chmod u+w web/sites/default
Make sure there is time
Make sure we set some extra run time for the many and large files involved.
lando composer config --global process-timeout 2000
Turn on lando
Get lando running…
lando start
Do a Dry-run
Make a “Dry-run” to see if the system says it should run cleanly.

Do it for real
Run the commands to update the drupal version.
lando composer update "drupal/core-*" --with-all-dependencies

NOTE: Make sure Platform CLI is installed and SSH connection established.
Say you are going from Drupal 9 to Drupal 10. But your current site is on Drupal core 9.3 and the most current version of main version 9 is 9.5.8. You want to make sure you first do an update from 9.3 to 9.5.8 before ou try a major version update. With minor updates you aren’t going to face different php versions, not likely different drush versions, and the typical steps are fairly straight-forward. Because we are doing this in containers and our local is in Lando, we will preceed our commands with the word lando.
First a test or dry run to see if anything blows up:
lando composer update "drupal/core*" -W --dry-run
This will show line by line all the things that would be updated with their names and versions. Don’t be surprised that a lot of the lines of for symphony because that is the framework Drupal is built in. And don’t be surprised if at the end you see something like..
conflicts
webflo/drupal-core-strict
For those or other errors/conflicts you want to run …
lando composer audit
That command will dump the details at a fairly high level. But, it will also give you a URL (http://something….) that you can copy for each conflict item and go look up if it is anything you need to worry about. Often it is just some security warning that was actually fixed by the very update you were trying to do with the dry-run. So you are clear to let the update run without that ‘dry-run’ part of the statement.
lando composer update "drupal/core*" -W
After the minor version update, go into your site and look at the update and error reports. You will probably see things like some module is deprecated (no longer used) but that some alternative is available for you do put in its place. A recent example is the CKeditor package where the old one was deprecated and you should activate the new; but you don’t have to because you also have the option to keep the old one which is now available and considered as a contributed module alternative. These types of things are typically not a big deal depending on how they may or may not be used on your site. Particularily if they are just development tools and new, better tool option upgrades are coming in, it would be a big deal at all. It is is something used in your main production site and you did some really unique things with it, it may take longer for a workaround.
Merge, Test, Launch
Merge ‘develop’ into ‘staged’
Say our have been working back and forth with your Lando ‘local’ and Platform.sh ‘develop’ branches doing saves, commits, and syncs as you work. You have done your first level practical testing by driving around in your Platform.sh hosted ‘develop’ branch and things look great. Since that ‘develop’ branch was cloned from your ‘staged’ branch you want to move the changes up one level so you can carry out your formal testing on the hosted ‘staged’ branch.
Go down to the lower left corner of your VSCode IDE and click on the branch name; probably ‘develop’ since that is what you just said you were happy with. When you click, the command bar at the top should show up and now you want to click ‘staged’ (the basic one, not the longer named ‘origin/staged’ one. Now you should see this in that lower left corner.
Click on the Git Source Control logo (odd branch thing with circle on the branches). Go to the line in the left panel that says “SOURCE CONTROL” and click on the three dots on the right end of that line. An option pull down list should appear and you will move down it to the Branch option. From the sublist that appears, select the Merge Branch option.
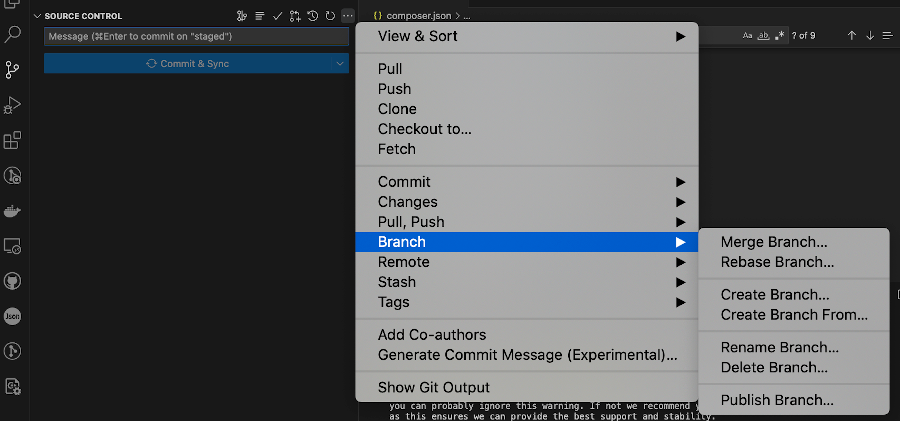
That will open the command bar at the top with a message to “Select a branch to merge from

You enter 'develop' in that box because you want to grab all your fine development work and bring it into the ‘stage’ environment for final testing.
Do your testing
Insert a link here to any testing recommendations on a separate page.Merge ‘staged’ into ‘main’
Go into the ‘main’ branch in your VSCode IDE. The lower left indicator should look like this.

Go to the line in the left panel that says “SOURCE CONTROL” and click on the three dots on the right end of that line. An option pull down list should appear and you will move down it to the Branch option. From the sublist that appears, select the Merge Branch option.
That will open the command bar at the top with a message to “Select a branch to merge from
You enter 'staged' in that box because you want to grab all your fully tested work and bring it into the ‘main’ production environment and bring it live to the world.
Common ‘Bumps in the Night’
php Update?
Does the version of Drupal you are going to attempt to update too require a php version update? If so, you may need to follow these steps. The “may” part of that statement is because sometimes it depends on how up to date lando is, which may depend on how up to date your local computer operating system is, etc.
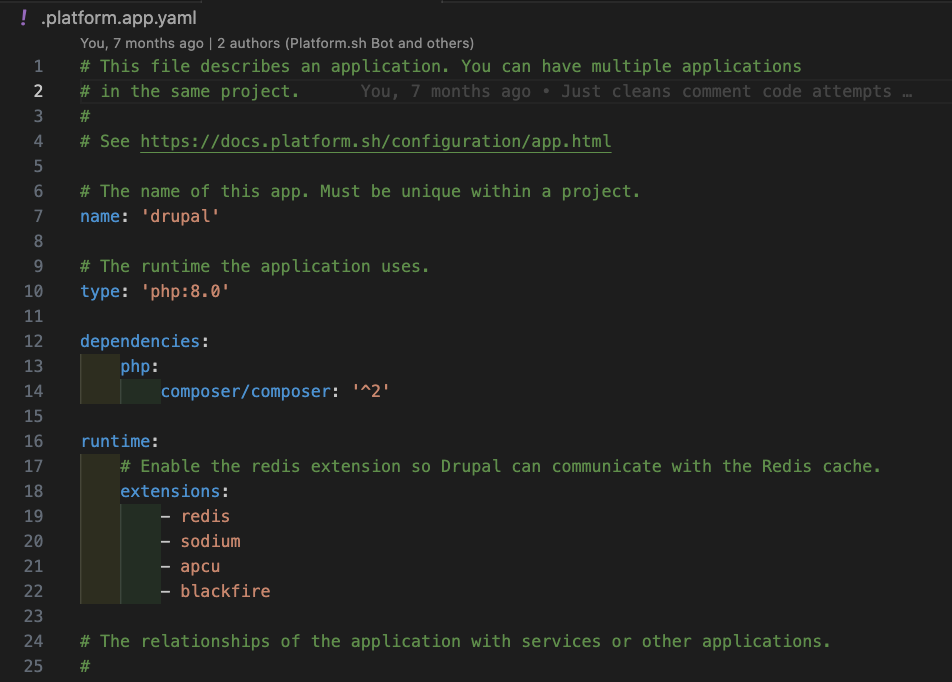
Lando attempts to mirror the environment you are using to run your application on the host. So with Drupal, you will want to open the .platform.app.yaml file on your local machine and look near the top for what php version is currently running. In my most recent case it was 8.0 but I was heading toward a Drupal version that needed php 8.1. So just edit the entry behind “type” in line ten in the example below.
That simple edit could be all you need. You will want to at least to a lando rebuild after making that end. I would suggest you go one step further and to a lando destroy followed by a lando poweroff and then go into your Docker Desktop and stop the running local containers that were behind the prior running Drupal application. If you look at the “images” in your Docker Desktop before you “remove” them, you will probably notice one has the old php 8.0 (or whatever you are coming from) in the name of the image toward the tailend. Basically what you are doing is clearing out the old php image so the new one called bye the type: php 8.1 line doesn’t bump into it.
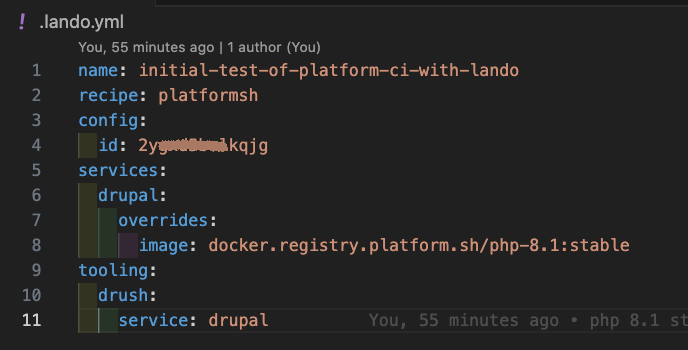
The little idiosyncracy noted next may be just a temporary thing that future lando application updates will fix. But Platform.sh uses a php-8.1:stable image and the basic line of type: php 8.1 calls a slightly different image. So you want to override this in your .lando.yml file. If you look this up with an internet search you will probably see people telling you how they inserted this code to do that.
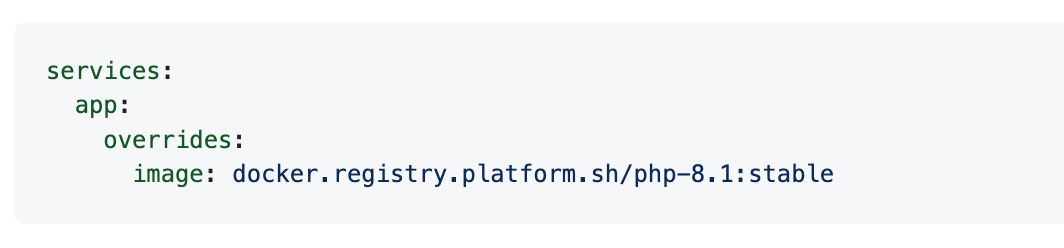
In reality, you will pound your head against the wall if you use that. Rather, since your ‘app’ is Drupal, your .lando.yml needs to look something like this in that “services:” section.
Remove modules
Run the following Drush command to uninstall the module:,br>
lando drush pm-uninstall module_name
Next, clear cache using the Drush command:
drush cr
Run
composer remove drupal/module
Go look in your /web/modules/contrib subdirectory to confirm the modules have been removed, including their specific subdirectory. If not, you can go into that module’s subdirectory and run…
rm -rf module_name
“System Components”
Drush update
The command itself is very simple. However you definitely want to do it with a --dry-run appended to see what conflicts may exist.
lando composer require 'drush/drush:^12' --dry-run
In the major version update between Drupal 9.5.10 to Drupal 10.1.3 I had all sorts of bumps in the night. I had made the strategic error of adding the Aggregator contributed module to replace the deprecated one on the shifted Drupal Core. I had also added the Update_Status module in preparation for doing the update from the Drupal verion that my project was previously on (9.3). While the Update_Status module was helpful to see what changes needed to be made to get Drupal 9.5.10 in shape to make the shift, who would have thought it was one of the two which actually created a ‘guzzle’ conflict in the composer process. So I uninstalled and removed both modules and even then still needed to do both a composer update step and fully remove my composer lock file on the product to get the Drupal update to version 10 to work. After checking, that Drupal update did NOT update Drush to 12 but left it at 11.6. Platform.sh indicated it was running and needed Drush 12. So that was done AFTER the Drupal update but before merging the ‘local’ up the chain through ‘develop’, ‘staged’, and ‘main’.
After the “–dry-run” passes muster, just remove it from the above command string and run…
lando composer require 'drush/drush:^12'
Composer-update version
How you update..
composer self-update
Platform.sh
You can look at the PHP and/or Composer versions that Platform.sh is using by examining the copy of platform.app.yml in your local copy of the project; right near the composer.json file.
Version you are moving to…
First check the Host PHP version cabability before moving it forward too far!
don't move forward more than the Drupal version you are updating to can run.Platform.sh
Edit the copy of platform.app.yml in your local copy of the project; right near the composer.json file. Then do your Git commit, Git sync in your VSCode IDE to get it up to the host.
Updated to platform.sh to php 8.1
Lando
Run lando in the local copy of the project:
lando init
Find the lando yml file and edit the PHP version line to the new one you want:
# .lando.yml
services:
  appserver:
    type: php:8.1 #edit this line
Destroy and rebuild after making that php-change:
lando destroy -y && lando start
Docker
Don’t directly update Docker. Let Lando do the Docker update to the version it is compatible with.
I screwed up
Back me out
This assumes the local lando Drupal update isn't running right AND that you haven't pushed the update to the host (Platform.sh and GitHub)!You are going to flush the whole local copy of the project and simply clone the clean copy you have in the repository to restore the local.
a) Go to the project in your VSCode IDE at its top level. Then do a shift-command-P to pull up the command bar where you will start typing Gitclone <project name> to pull it back local.
b) Go to the terminal in VSCode and type lando start to make sure the project that was restored is what you expected.
c) Make your next move!
This assumes the local lando Drupal update isn't running right AND you also made the error of pushing the bad update to the host (Platform.sh and GitHub)!Nearly the same as if you hadn’t pushed it to Platform.sh EXCEPT first you are going to restore the backup you made on Platform.sh then you are going to flush the whole local copy of the project and simply clone the clean backup copy you have in the repository to restore the local.
a) Go toward the end of the section discussing back Up on Platform.sh and you will see the “Restore” option on the image which you can select and bring that copy back live. Give it a chance to run, especially if it happens to be large.
b) Go to the project in your VSCode IDE at its top level. Then do a shift-command-P to pull up the command bar where you will start typing Gitclone <project name> to pull it back local.
c) Go to the terminal in VSCode and type lando start to make sure the project that was restored is what you expected.
d) Make your next move!